How to Remove a Stripped Screw: Practical Methods for Precision Mechanical and Automation Assemblies
11 min
- 1. Common Causes of Stripped Screws
- 2. Recommended Tools for Stripped Screw Removal
- 3. Inspect the Screw Before Extraction
- 4. Choose the Least Aggressive Removal Method First
- 5. Method 1 — Rubber Band and Friction Enhancement
- 6. Method 2 — Shock-and-Turn Technique
- 7. Method 3 — Torx Bit Extraction for Rounded Hex Sockets
- 8. Method 4 — Screw Extractors and Left-Hand Drill Bits
- 9. Method 5 — Cutting a New Slot with a Rotary Tool
- 10. Method 6 — Adhesive Bonding Methods
- 11. Method 7 — Drilling Out the Screw
- 12. Precautions for Precision Mechanical and Electronics Systems
- 13. How to Prevent Stripped Screws
- 14. Frequently Asked Questions
- Conclusion
A stripped screw occurs when the driver can no longer grip the screw head properly due to worn or damaged drive geometry. This commonly affects Phillips, hex socket, and Torx fasteners after excessive torque, corrosion, repeated maintenance cycles, or improper tool selection.
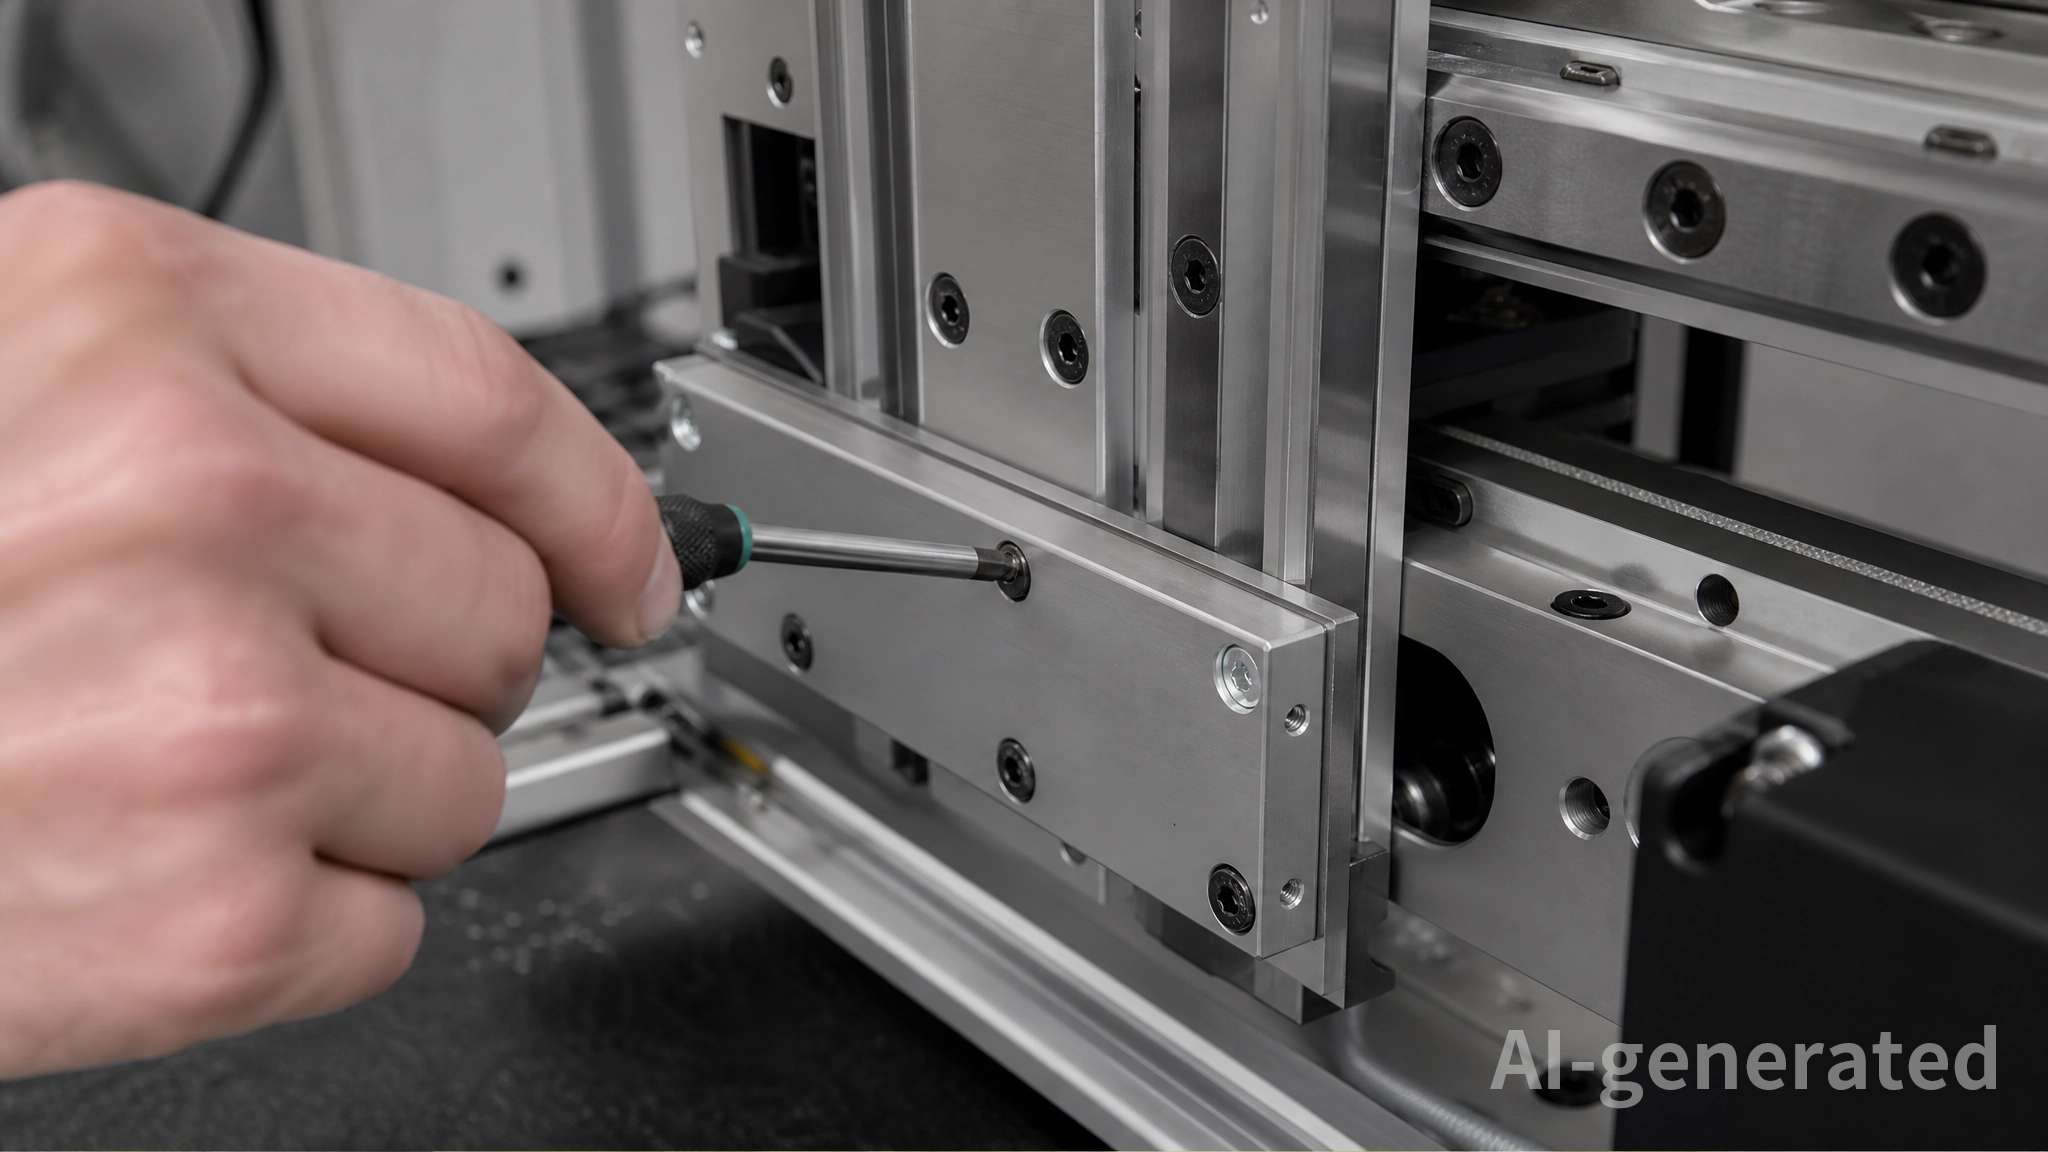
In automation equipment, CNC systems, electronics assemblies, and linear motion applications, stripped screws can become especially difficult to remove because surrounding components are often compact and sensitive. Assemblies built with aluminium extrusion frames, linear guide systems, actuator brackets, and control enclosures usually provide limited access and minimal working clearance.
Improper extraction methods may damage nearby guide rails, threaded aluminium plates, sensor mounts, or populated circuit boards. Using the correct removal technique is essential for protecting surrounding components and reducing maintenance downtime.
This guide explains practical methods for removing stripped screws safely and efficiently, starting from low-risk techniques and progressing toward advanced extraction procedures commonly used in precision mechanical systems.
1. Common Causes of Stripped Screws
Several conditions commonly lead to stripped screws in mechanical and electronic assemblies:
· Using the wrong driver type or size
· Excessive tightening torque
· Worn screwdriver or hex key edges
· Corrosion between dissimilar metals
· Poor-quality fasteners
· Repeated assembly and disassembly
Small screws used in electronics and compact automation systems are especially vulnerable because they have shallow drive geometry and limited engagement area.
Common examples include fasteners used in:
· Linear rail and motion systems
· Aluminium extrusion assemblies
· Stepper motor mounting brackets
· Compact CNC platforms
· Sensor positioning modules
· Electronics control enclosures
These assemblies often use small metric fasteners installed in confined spaces where improper tool engagement can quickly damage the screw head.
2. Recommended Tools for Stripped Screw Removal
Before attempting extraction, prepare the correct tools. Using improper tools usually worsens the damage.
| Tool | Purpose |
| Precision screwdrivers | Small electronics screws |
| JIS screwdriver set | Japanese industrial fasteners |
| Metric hex keys | Hex socket screws |
| Torx bits | Additional grip in rounded sockets |
| Rubber band | Friction enhancement |
| Valve grinding compound | Increased driver traction |
| Left-hand drill bits | Pilot extraction |
| Screw extractor set | Removing damaged screws |
| Rotary tool with cutting disc | Cutting a new slot |
| Thread repair kit | Restoring damaged threads |
Many precision mechanical assemblies use recessed socket-head fasteners installed near linear guides, actuator plates, and compact drive systems. In these situations, high-quality drivers and precision extraction tools are important for avoiding damage to surrounding motion components.
For electronics work, magnification and adequate lighting are also strongly recommended.
3. Inspect the Screw Before Extraction
Not every damaged screw is fully stripped. Dirt, grease, thread locker residue, or metal debris inside the recess may prevent proper tool engagement.
Before applying force:
1. Clean the screw head with isopropyl alcohol
2. Remove debris using compressed air or a nylon brush
3. Inspect the recess under magnification
4. Test the correct driver size carefully
In many cases, a high-quality driver with proper fit can still remove the screw without additional extraction methods.
Rounded hex sockets may still retain partial wall engagement, especially in aluminium extrusion frames and motor mounting assemblies where repeated adjustments gradually wear the recess instead of destroying it completely.
4. Choose the Least Aggressive Removal Method First
When removing a stripped screw from precision mechanical or electronic assemblies, the safest approach is to begin with the least aggressive extraction method and escalate only when necessary.
Excessive force, uncontrolled drilling, or improper cutting techniques can damage surrounding components far more severely than the original fastener problem. In automation equipment and CNC assemblies, nearby parts may include aluminium threads, linear guide systems, motor mounts, sensors, or populated PCBs that are sensitive to vibration, debris, and mechanical stress.
For this reason, stripped screw removal should follow a gradual escalation process:
1. Friction-based methods
2. Shock-assisted loosening
3. Mechanical engagement techniques
4. Screw extraction tools
5. Slot cutting methods
6. Adhesive bonding methods
7. Controlled drilling and thread repair
Starting with low-risk methods improves the likelihood of preserving both the fastener interface and the surrounding assembly.
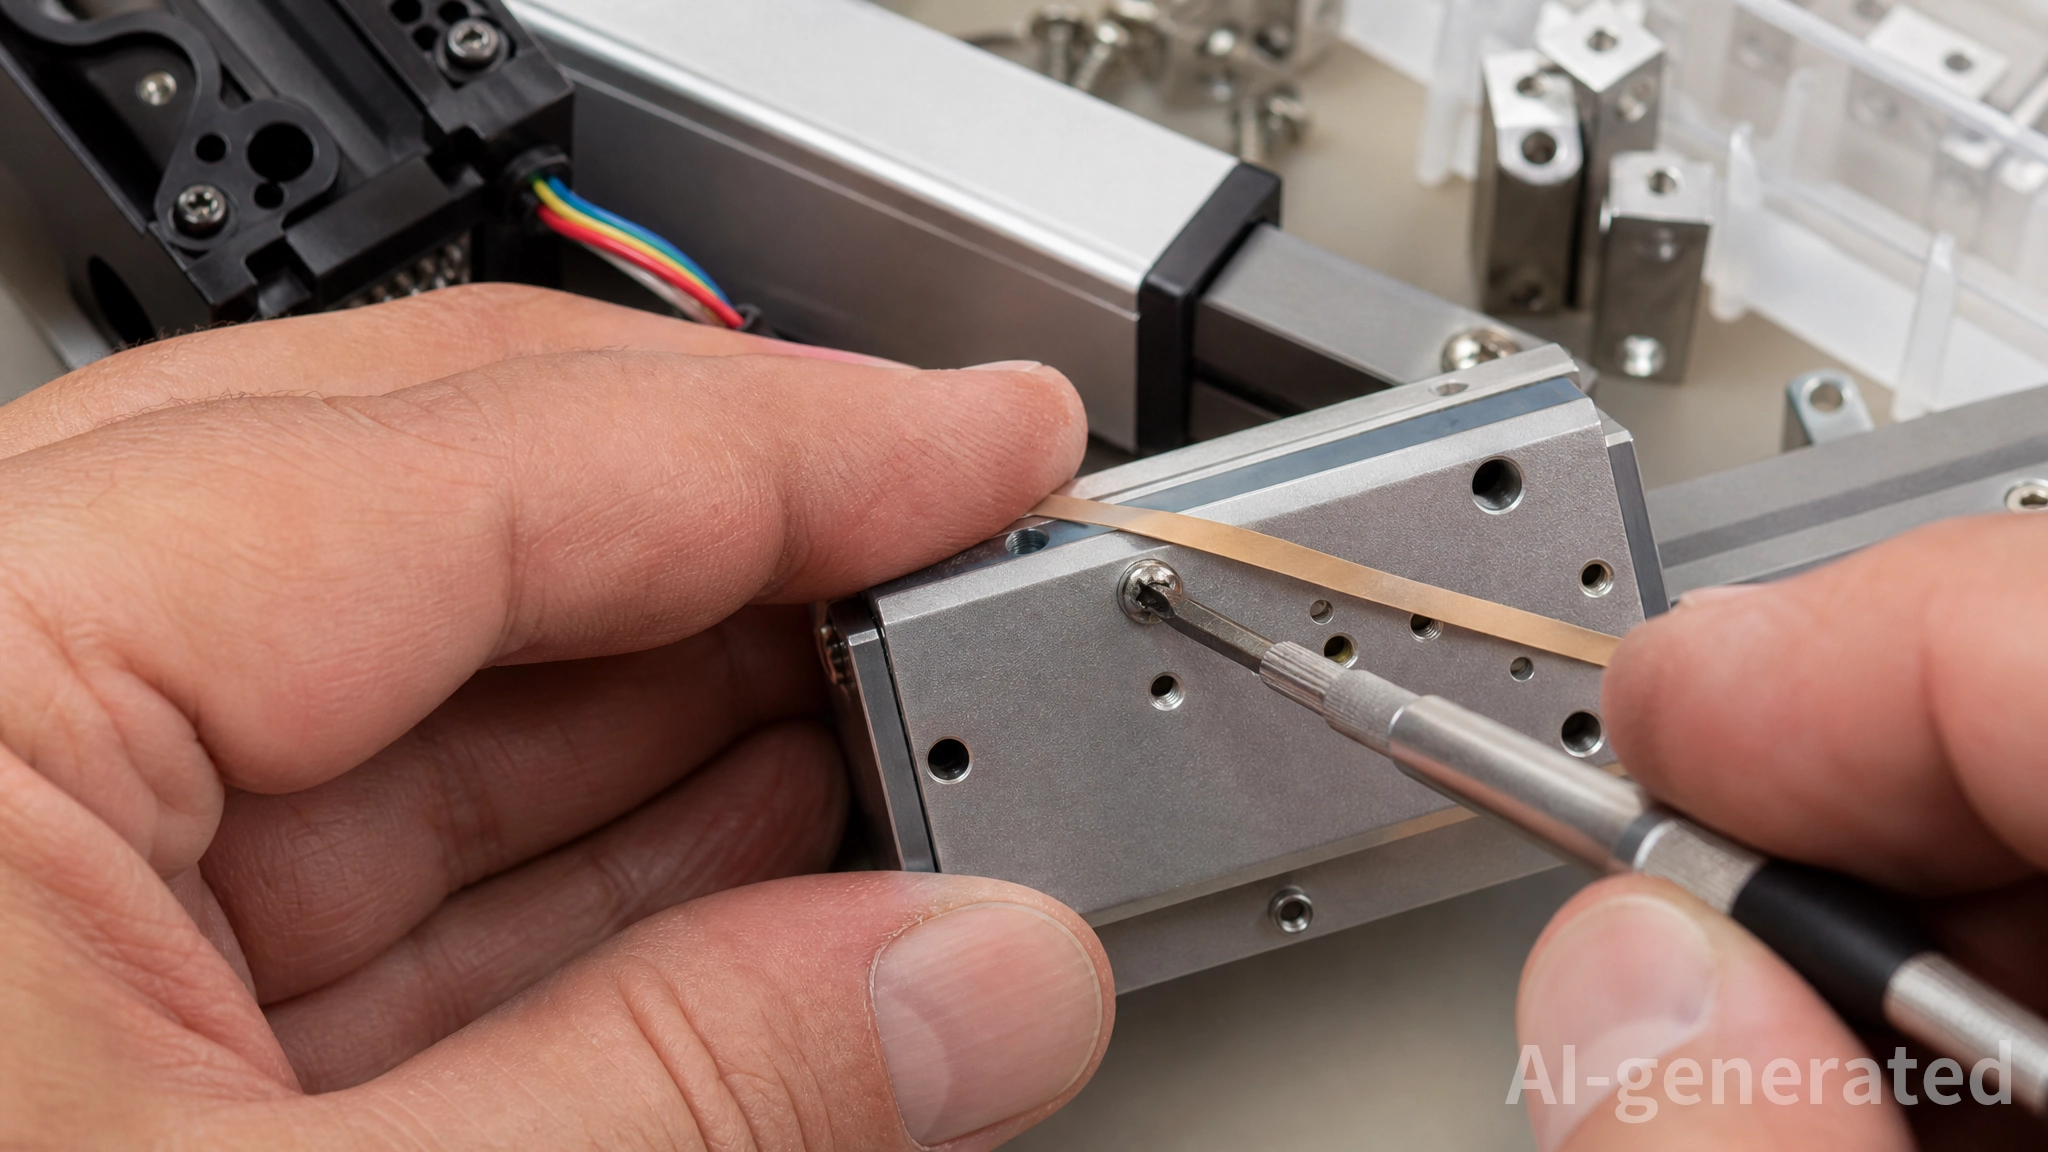
5. Method 1 — Rubber Band and Friction Enhancement
This is the safest starting method and works well for partially damaged screws.
Place a wide rubber band over the screw head and press the driver firmly into the recess. The rubber fills small gaps and increases friction between the tool and the screw.
Apply:
· Strong downward pressure
· Slow and controlled rotation
· No sudden twisting motion
If additional grip is needed, apply a small amount of valve grinding compound into the recess before inserting the driver.
This method is effective for:
· Small electronics screws
· Lightly rounded Phillips heads
· Partially damaged hex sockets
· Sensor bracket fasteners
· Compact control module screws
For electronics assemblies and compact automation hardware, this low-risk approach helps prevent vibration damage to nearby components.
6. Method 2 — Shock-and-Turn Technique
When corrosion or thread-locking compound prevents movement, controlled impact can help break static friction.
Insert the correct driver firmly into the screw head and apply a light hammer tap while simultaneously applying turning force.
This method can help loosen screws affected by:
· Thread locking compounds
· Galvanic corrosion
· Long-term vibration exposure
It is commonly used on steel fasteners installed in aluminium extrusion systems, motor brackets, and machine frames where galvanic corrosion gradually increases thread resistance.
Avoid excessive impact near:
· PCBs
· Ceramic components
· Linear bearings
· Optical sensors
· Precision guide systems
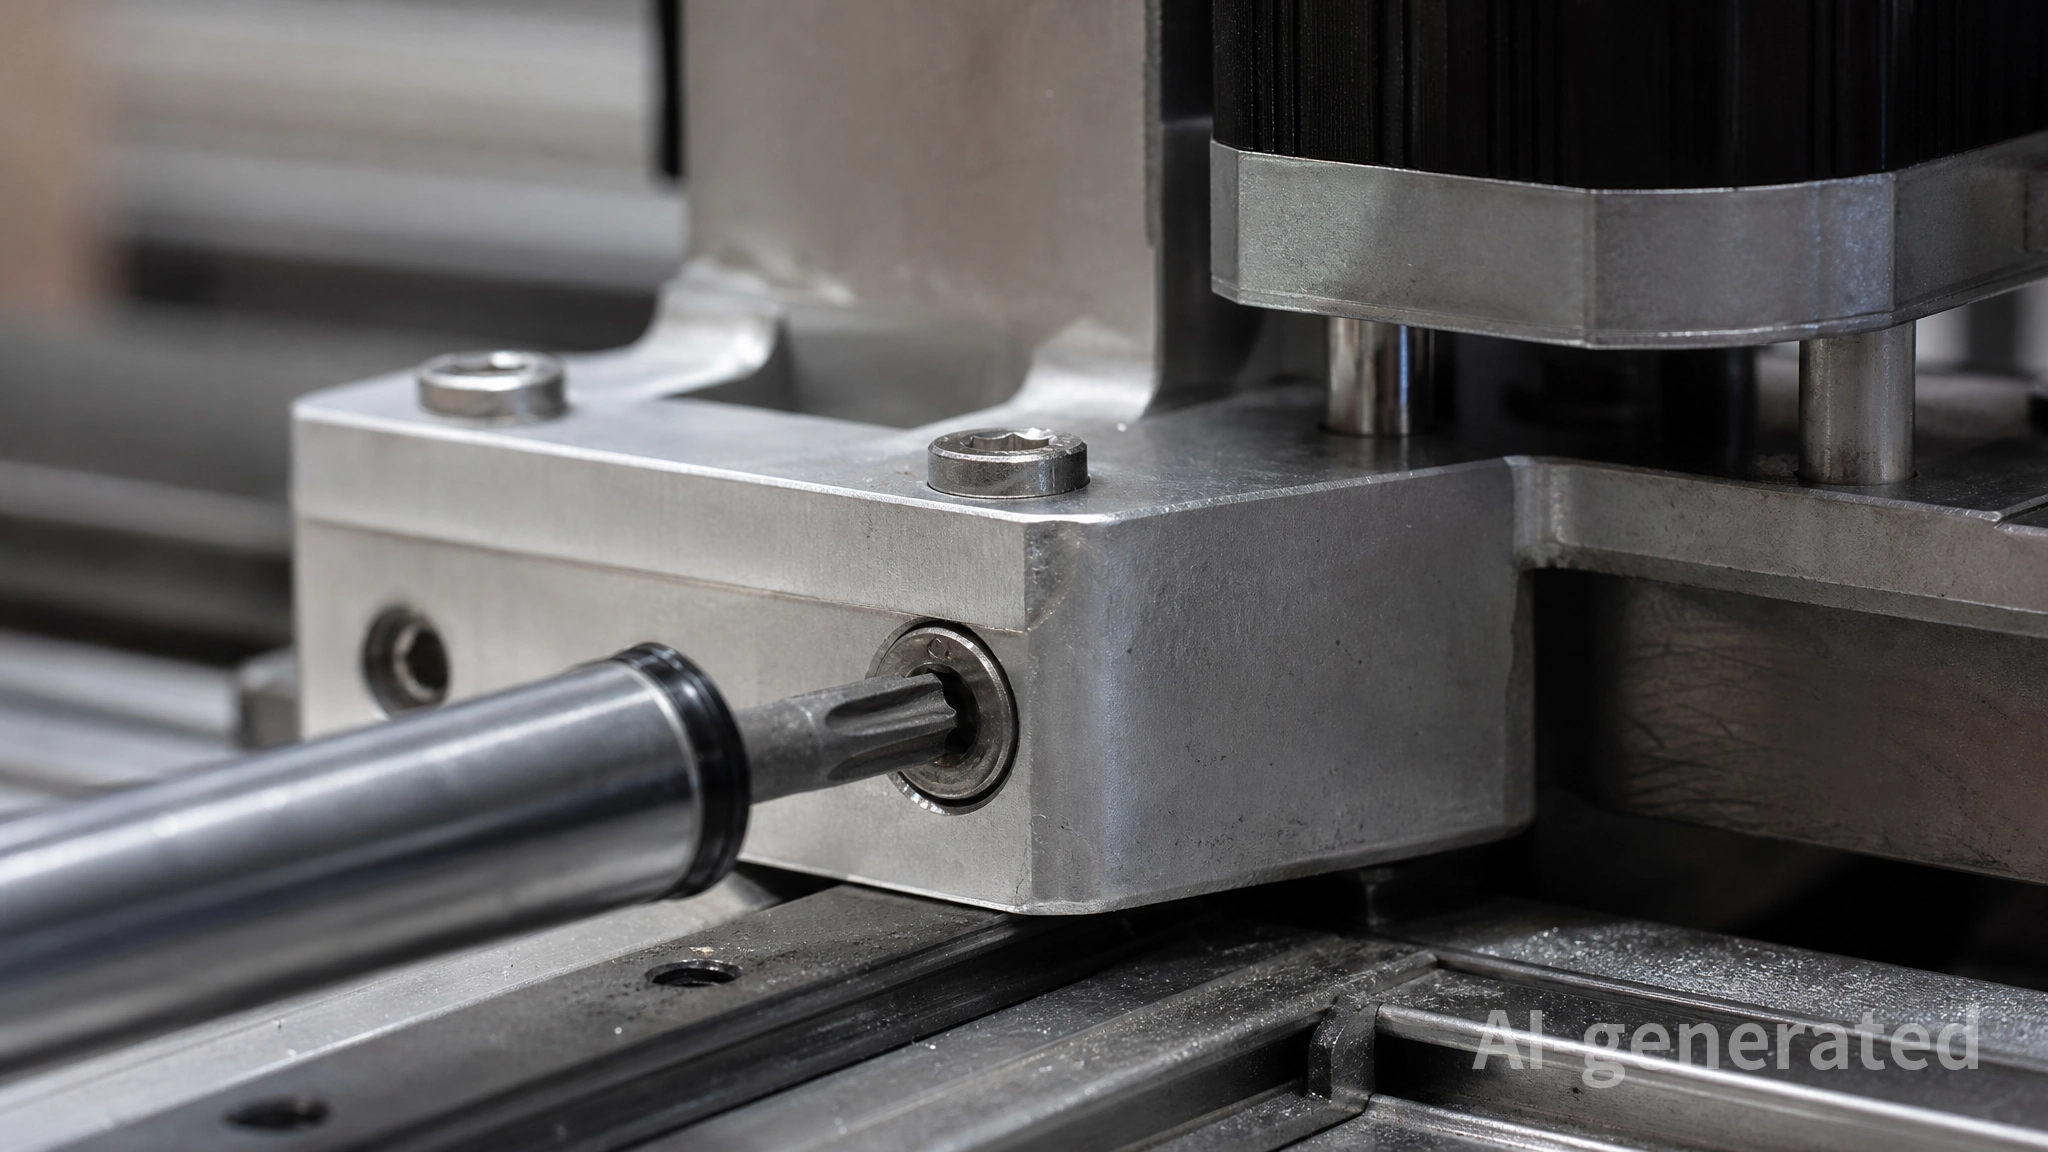
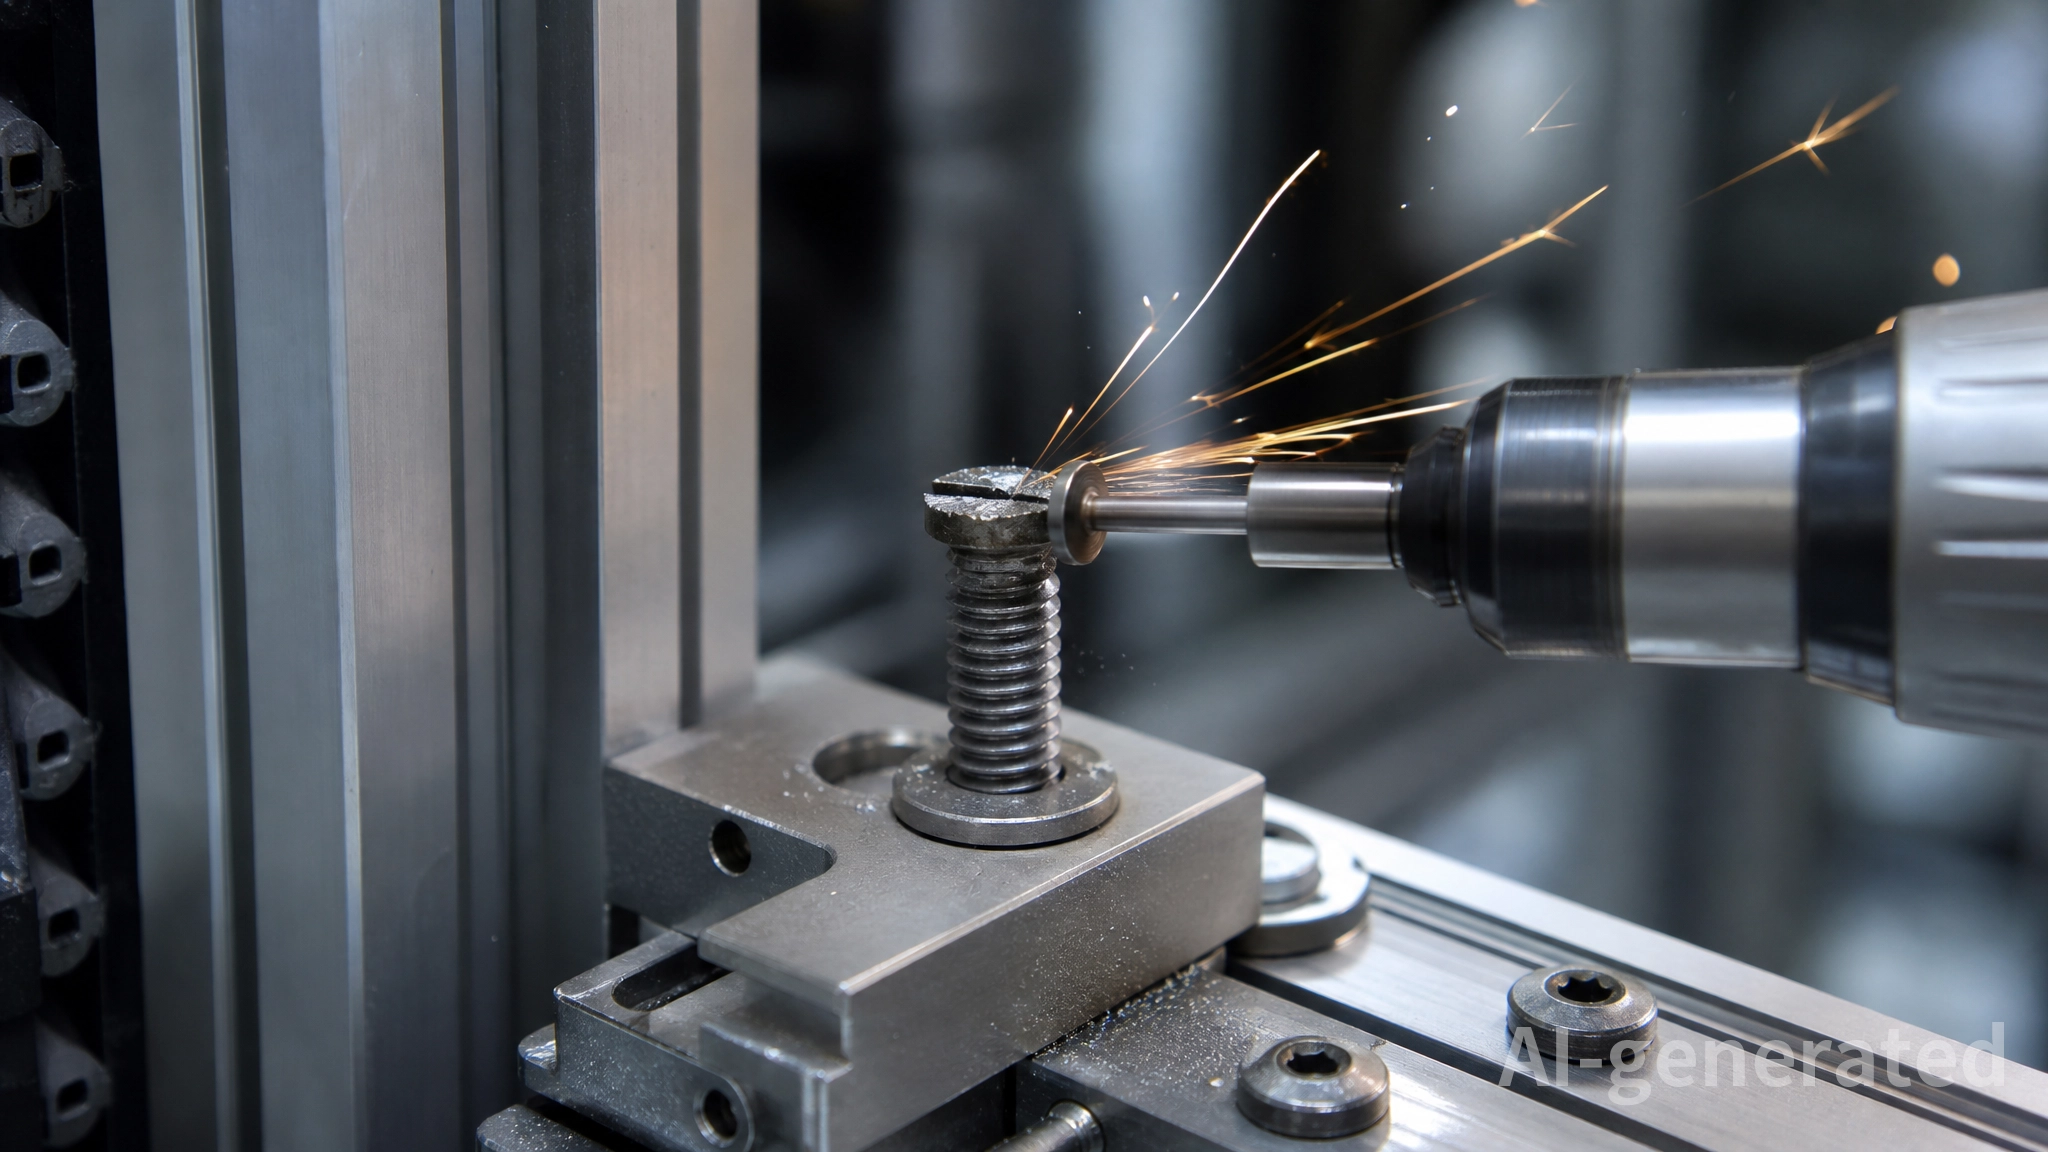
7. Method 3 — Torx Bit Extraction for Rounded Hex Sockets
Rounded hex sockets can sometimes be removed by driving a slightly oversized Torx bit into the damaged recess.
Choose a Torx bit slightly larger than the original hex size and tap it gently into the socket using light hammer pressure. The Torx edges may create enough mechanical engagement to loosen the screw.
Important precautions:
· Apply only moderate force
· Keep the driver aligned vertically
· Stop immediately if the surrounding material begins deforming
This method works particularly well on socket-head screws commonly found in:
· Aluminium extrusion framing systems
· Linear actuator assemblies
· Stepper motor mounting brackets
· Compact automation equipment
· CNC support structures
These assemblies frequently use recessed metric fasteners where limited access increases the likelihood of rounded sockets during maintenance.
8. Method 4 — Screw Extractors and Left-Hand Drill Bits
When the original drive geometry is completely damaged, screw extractors are often the next step.
A screw extractor is a hardened tool with a left-hand spiral flute tapered toward the tip. After drilling a pilot hole into the screw center, the extractor bites into the material during counterclockwise rotation.
Recommended procedure:
1. Mark the center using a spring-loaded center punch
2. Drill a pilot hole using a left-hand drill bit
3. Insert the extractor carefully
4. Rotate slowly using a tap wrench
In many cases, the left-hand drill bit alone may remove the screw before the extractor is needed.
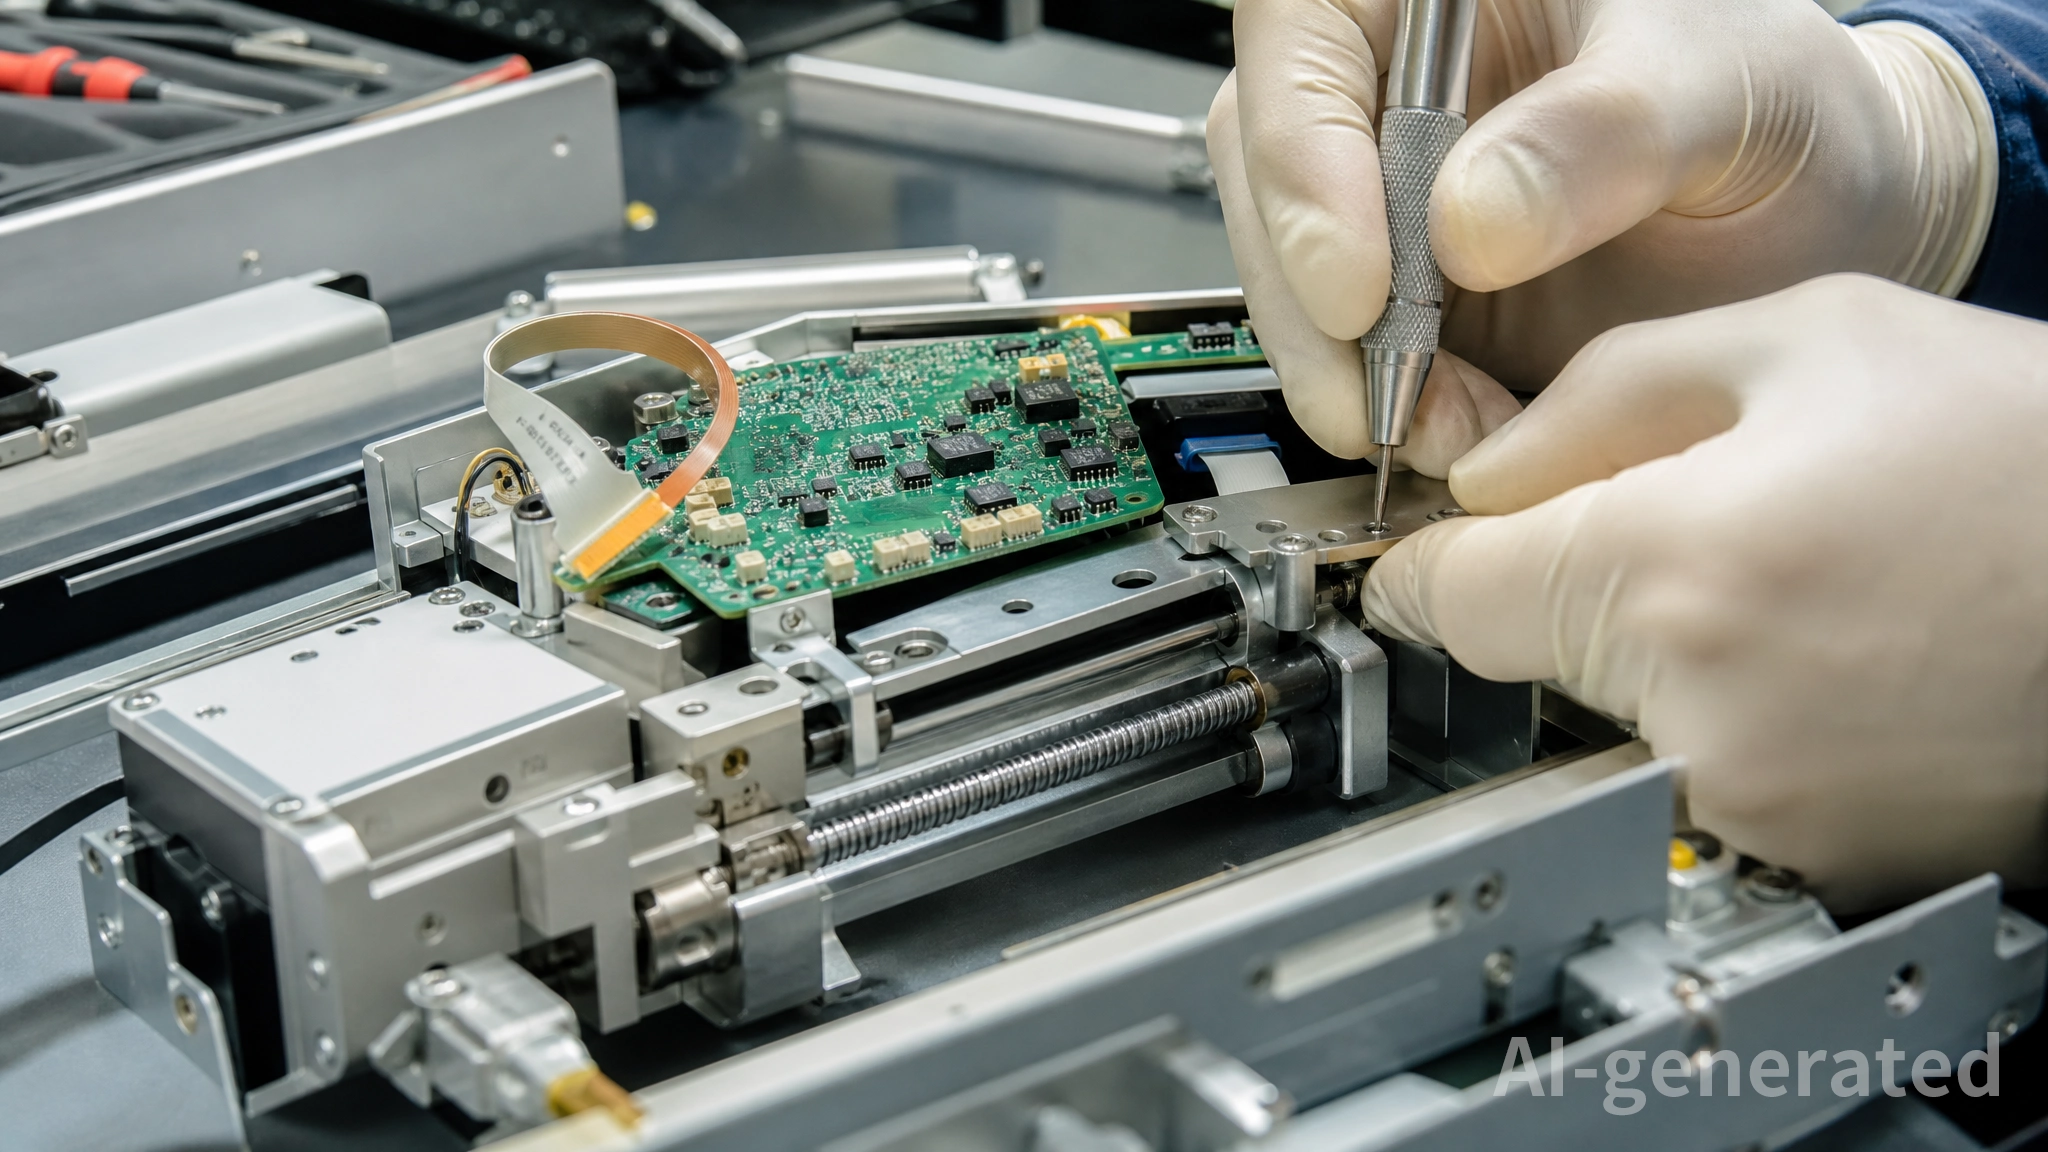
For electronics assemblies:
· Remove nearby boards if possible
· Cover exposed connectors
· Prevent metal chips from contacting circuitry
For linear motion systems and compact automation assemblies, drilling debris must be carefully controlled. Metal particles can contaminate bearing raceways, sliding surfaces, and threaded motion components.
Extractor breakage is difficult to repair because hardened extractor steel is extremely difficult to drill. Apply only controlled torque.
9. Method 5 — Cutting a New Slot with a Rotary Tool
If the screw head protrudes above the surface, cutting a new slot is often the fastest solution.
Use a thin cutting disc to create a straight slot across the screw head. Then remove the screw using a hollow-ground flathead screwdriver.
Best practices:
· Protect nearby components from debris
· Cut gradually to avoid removing the screw head
· Maintain stable tool control
This method is commonly used during maintenance of:
· Aluminium profile structures
· Linear motion platforms
· CNC support frames
· Motor mounting systems
· Compact industrial automation equipment
When working near linear rails or motion assemblies, cover exposed guide surfaces carefully. Abrasive particles and metal chips can significantly reduce bearing life.
Do not use this method near populated electronics without proper debris isolation.
10. Method 6 — Adhesive Bonding Methods
For small recessed screws surrounded by sensitive electronics, adhesive bonding methods may be safer than drilling.
Epoxy Bond Method
Clean the screw head thoroughly and apply high-strength metal epoxy into the damaged recess. Insert a sacrificial driver bit and allow the adhesive to fully cure before attempting removal.
This creates a temporary bonded joint capable of transmitting moderate extraction torque without generating metal debris.
This method is useful for:
· Compact controller assemblies
· Embedded electronics enclosures
· Small fastening points in automation systems
Cyanoacrylate and Baking Soda Method
Fill the recess with baking soda and apply thin cyanoacrylate adhesive. Before the material fully hardens, insert a driver bit to form a custom engagement shape.
This method generates minimal vibration and no conductive debris, making it suitable for delicate electronic assemblies and compact control hardware.
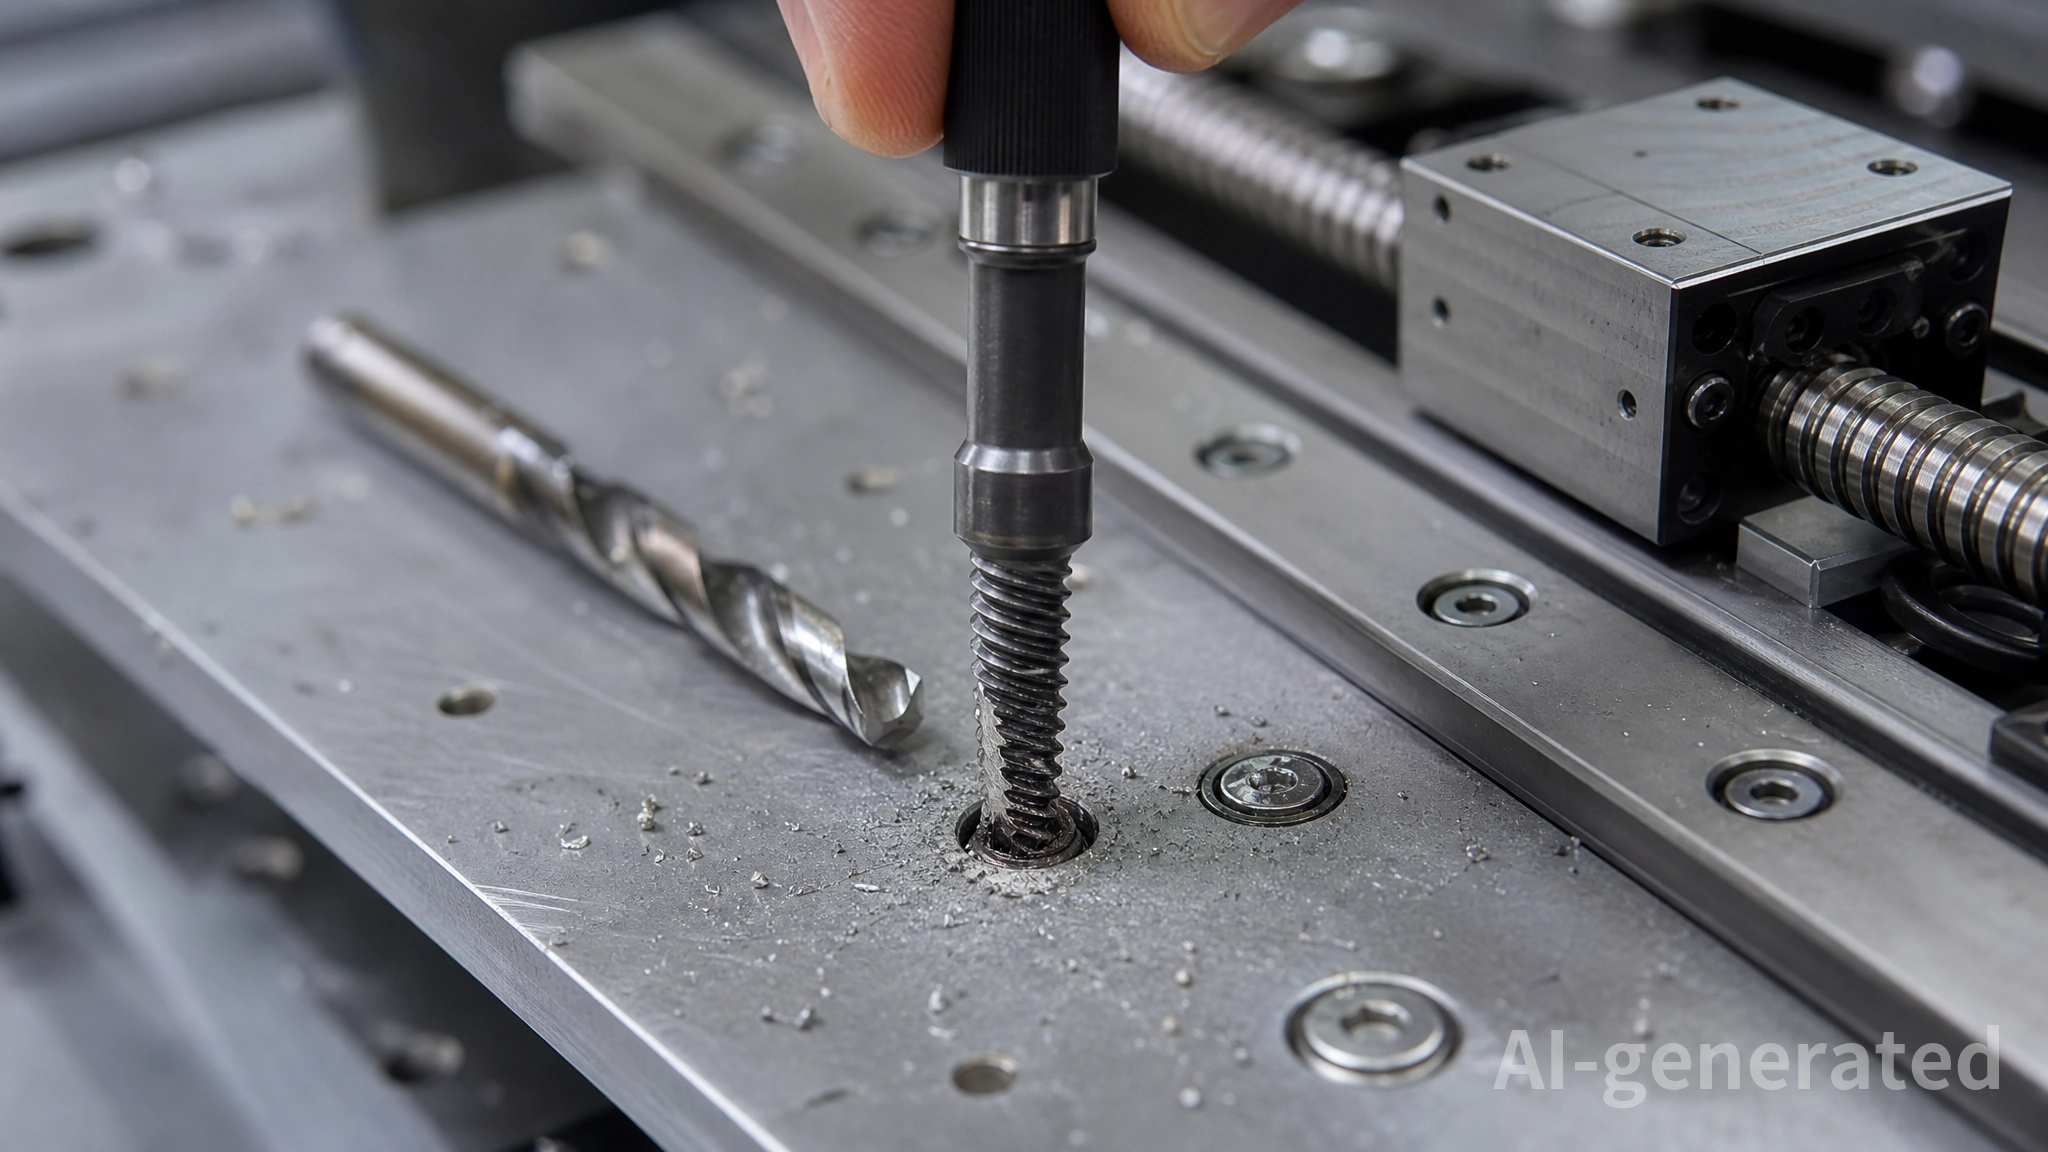
11. Method 7 — Drilling Out the Screw
Drilling is the final option when all other methods fail.
Select a drill bit approximately equal to the screw’s minor diameter and drill through the center of the screw body. After removal, clean the remaining threads using the correct tap.
If the original threads are damaged, install a threaded insert such as a Helicoil.
This method is commonly used for:
· Broken motor mounting screws
· Damaged aluminium threads
· Seized structural fasteners
· Motion system mounting plates
· CNC frame assemblies
When drilling near electronics:
· Remove nearby boards whenever possible
· Use vacuum extraction continuously
· Clean thoroughly after drilling
Metal debris can permanently damage electronic assemblies and precision motion systems.
12. Precautions for Precision Mechanical and Electronics Systems
Certain assemblies require additional care during screw extraction.
Linear Motion Systems
Metal particles can contaminate bearing raceways and reduce service life in linear motion systems. Before drilling or cutting near guide rails or sliding assemblies, cover exposed surfaces carefully to prevent debris intrusion.
PCBs and Controller Boards
Conductive debris may short exposed traces or components. Use masking tape, compressed air, and vacuum extraction during cleanup.
Aluminium Threads
Aluminium threads are relatively soft and easy to damage. Avoid excessive torque during extraction and thread restoration.
Small Fasteners
M2 and M2.5 screws have limited structural strength and can break easily during extraction. Use low force and precise alignment.
13. How to Prevent Stripped Screws
Prevention is more effective than extraction.
Recommended practices include:
· Use the correct driver type and size
· Replace worn hex keys and screwdriver bits
· Avoid excessive tightening torque
· Apply thread locker correctly
· Prevent thread galling and seizure
· Use quality fasteners with proper drive geometry
· Verify screw length before installation
High-quality fasteners and properly machined mechanical components significantly reduce the risk of stripped screws during long-term operation. Precision aluminium structures, linear motion assemblies, and modular automation systems benefit from accurate thread alignment, stable mounting surfaces, and proper torque control during installation.
For electronics and precision assemblies, torque-limiting screwdrivers are strongly recommended.
14. Frequently Asked Questions
Why do small electronics screws strip so easily?
Small screws have shallow drive geometry and limited engagement area. Incorrect driver size or excessive torque quickly damages the recess.
Can WD-40 remove a stripped screw?
WD-40 may help loosen seized threads, but it does not repair damaged drive geometry. Penetrating oil is more effective for galvanic corrosion and thread seizure.
Are screw extractors safe for electronics?
They can be used carefully, but drilling near populated PCBs creates contamination risks. Adhesive-based methods are usually safer for compact electronic assemblies.
What is the safest method for precision assemblies?
Start with low-risk methods such as:
· Rubber band
· Friction compound
· Correct driver selection
Only progress to drilling or cutting when necessary.
Conclusion
Removing a stripped screw requires controlled force, proper tooling, and a gradual escalation strategy. In automation equipment, CNC assemblies, electronics systems, and precision mechanical structures, careless extraction methods can easily cause secondary damage that exceeds the cost of the original fastener.
Starting with low-risk friction methods and progressing toward extraction, slot cutting, or drilling provides the highest probability of successful removal while protecting surrounding components.
Using proper tools, controlled torque, and high-quality mechanical components can significantly reduce the likelihood of stripped screws in future assembly and maintenance operations.
Keep Learning
How to Remove a Stripped Screw: Practical Methods for Precision Mechanical and Automation Assemblies
A stripped screw occurs when the driver can no longer grip the screw head properly due to worn or damaged drive geometry. This commonly affects Phillips, hex socket, and Torx fasteners after excessive torque, corrosion, repeated maintenance cycles, or improper tool selection. In automation equipment, CNC systems, electronics assemblies, and linear motion applications, stripped screws can become especially difficult to remove because surrounding components are often compact and sensitive. Assemblies bu......
7 Techniques for Effectively Using Set Screws
Set screws are a versatile type of fastener widely used in various mechanical and industrial applications. Their primary function is to secure an object within or against another object, such as attaching a gear to a shaft or holding a knob in place. To ensure the optimal performance and longevity of set screws, mastering essential techniques for their use is crucial. These techniques will help maximize the effectiveness of set screws, ensuring their reliability and durability across different applica......
Aluminum case and PCB assembly: tips to improve efficiency and precision
The aluminum case, also called an aluminum box or aluminum enclosure, is now widely used in industrial electronic products due to its lightweight, good thermal conductivity, and corrosion resistance. It is an ideal housing material. The combination of an aluminum case with PCB boards not only protects PCB boards from physical damage, such as impact and abrasion, but also effectively dissipates heat and maintains electronic components at a suitable temperature. There are various ways to install an alum......
Do You Really Know How to Use Hose Clamps Correctly?
Why Correct Hose Clamp Use Matters One improper hose clamp use can equal one shutdown. In liquid transport systems, ensuring stable flow and preventing leaks are among the top challenges. One small component that plays a big role in this is the hose clamp (also known in some regions as Jubilee clips). Although it's only about the size of a thumb, this common pipe fitting is often overlooked. A single loose hose clamp on a coolant return, vacuum hose, or fuel feed can trigger alarms, scrap parts, and u......
Air Source Treatment: Mastering the Key Elements of Compressed Air Systems
Air Source Treatment components are widely used in mechanical control and driving equipment for industrial automation due to their efficiency, cleanliness, modularity, and controllability. Their primary functions are to purify, regulate, and lubricate compressed air. Therefore, the selection and use of Air Source Treatment components are crucial to ensure the proper functioning of pneumatic systems. This article will analyze the key elements of compressed air systems from three perspectives: the conce......
7 Knob Secrets to Boost Precision in Industrial Machines
Fig. 1 A picture of Knurled Knobs Large Diameter Steel Head When machine controls start slipping or panels feel off, most technicians check wiring, bearings, or software glitches. But sometimes, the root cause is simpler—and more disruptive. A worn-out or mismatched control knob can throw off operations, compromise accuracy, and frustrate operators. In industrial machinery, knobs are not decorative—they're essential. They're the physical link between people and performance, used to turn, lock, or adju......