Screw Extractor Guide: How to Remove Broken Bolts and Studs
11 min
- What Is a Screw Extractor and How Does It Work?
- Broken Bolt vs. Stripped Screw: Which Are You Dealing With?
- Screw Extractor Types: Spiral, Straight, and Multi-Spline
- The Left-Hand Drill Bit: The Extractor's Partner
- Choosing the Pilot Drill Size
- How to Use a Screw Extractor: The Workflow
- Removing a Broken Tap: The Hardest Case
- When Extraction Fails: The Fallback Plan
- FAQ about Screw Extractor Guide
- About This Screw Extractor Guide
Key Takeaways
- A screw extractor (commonly called an easy out) is a hardened tool for removing broken fasteners, gripping them through spiral flutes, straight flutes, or multi-spline teeth depending on its design; many common types engage when turned counterclockwise.
- The workflow is drill a pilot hole, then turn the extractor counterclockwise; a left-hand drill bit often does the whole job on its own, backing the broken piece out while drilling.
- Broken-bolt and stripped-screw are different problems: a fastener with an intact head belongs to removal tricks, while a flush or recessed break needs the extractor workflow below.
- Extractors are hard and brittle. Excessive torque snaps them inside the hole, and a broken extractor is far harder to remove than the original broken bolt.
- Extracting a broken tap is the hardest case of all; tap extractors help in limited conditions, and severe cases go to specialized services such as electrical discharge machining.
- When extraction fails, the fallbacks are real: drill the whole thing out and re-tap one size larger, or rebuild the hole with a threaded insert.
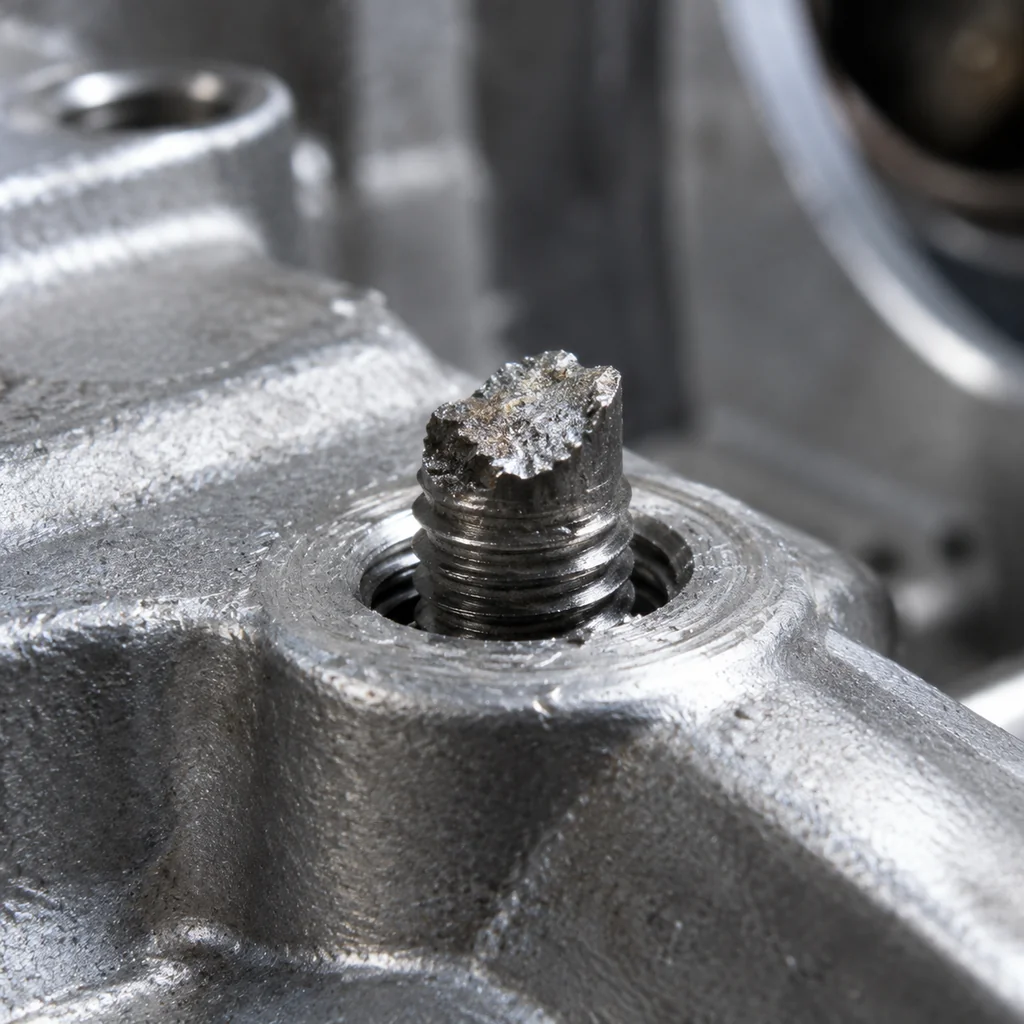
A bolt snaps off flush with the housing half a step from finished assembly, and the part goes from nearly done to seemingly worthless in one turn of the wrench. There is no head to grab, no slot to bite, and the piece in the hole is often rust-welded in place. This is the scenario screw extractors exist for, and it is also the scenario where impatience turns one broken bolt into a scrapped housing.
What Is a Screw Extractor and How Does It Work?
A screw extractor is a hardened steel tool made to grip a broken fastener so it can be backed out. Designs differ — spiral flutes, straight flutes, or multi-spline teeth, covered in the next section — and many common types are turned counterclockwise to engage. The working logic for the classic tapered left-hand design is simple once seen:
- A pilot hole is drilled into the center of the broken fastener.
- The extractor is turned counterclockwise into that hole.
- Its left-hand taper wedges tighter as torque increases, gripping the broken piece like a barb.
- Continued counterclockwise turning backs the broken fastener out of its hole.
The grip is frictional and wedge-based, which is why extractor success depends so heavily on the pilot hole being right: too large and the extractor never bites, too small and there is no room for the flutes to seat. "Easy out" is the shop nickname, and the tools are often sold under it; the formal category name is screw extractor or bolt extractor.
Broken Bolt vs. Stripped Screw: Which Are You Dealing With?
The tool choice depends on what kind of failure is on the bench, and the two get confused because both end in "can't turn it":
- Head stripped or rounded, head still present: there is still something to grip. Rubber-band friction, a larger Torx bit hammered in, or a rotary-tool slot usually solves it before any extractor comes out. This is the territory of our stripped screw removal guide.
- Bolt broken flush or below the surface, or a stud snapped in the hole: there is nothing to grab. This is extractor country, and everything from here on applies.
- Tap broken inside a tapped hole: harder than both, because taps are harder than bolts. See the broken-tap section near the end.
Judging this first saves an hour: extraction tools are the slow, aggressive option, and using them on a problem that a rubber band would solve is a common way to make things worse.
Screw Extractor Types: Spiral, Straight, and Multi-Spline
Extractors come in three flute geometries, and the differences between them are structural rather than a ranking:
| Type | Flute form | Design characteristics |
|---|---|---|
| Spiral flute | Flutes spiral like a drill bit | Designed to grip the fastener as the extractor is turned |
| Straight flute | Tapering wedges with straight edges | Uses straight gripping edges to engage the broken fastener |
| Multi-spline | Many shallow spline teeth | Provides multiple contact points for gripping |
Material matters alongside geometry: standard HSS extractors cover most bench work, while cobalt-alloy versions hold up better on hard, heat-treated fasteners. All of them share the defining property and its consequence: they are harder than the bolt you are removing, and that hardness makes them brittle. An extractor twisted past its limit does not bend; it snaps.
The Left-Hand Drill Bit: The Extractor's Partner
A left-hand drill bit cuts with a counterclockwise helix, the mirror image of a normal drill bit. Its role in broken-fastener work is genuinely dual:
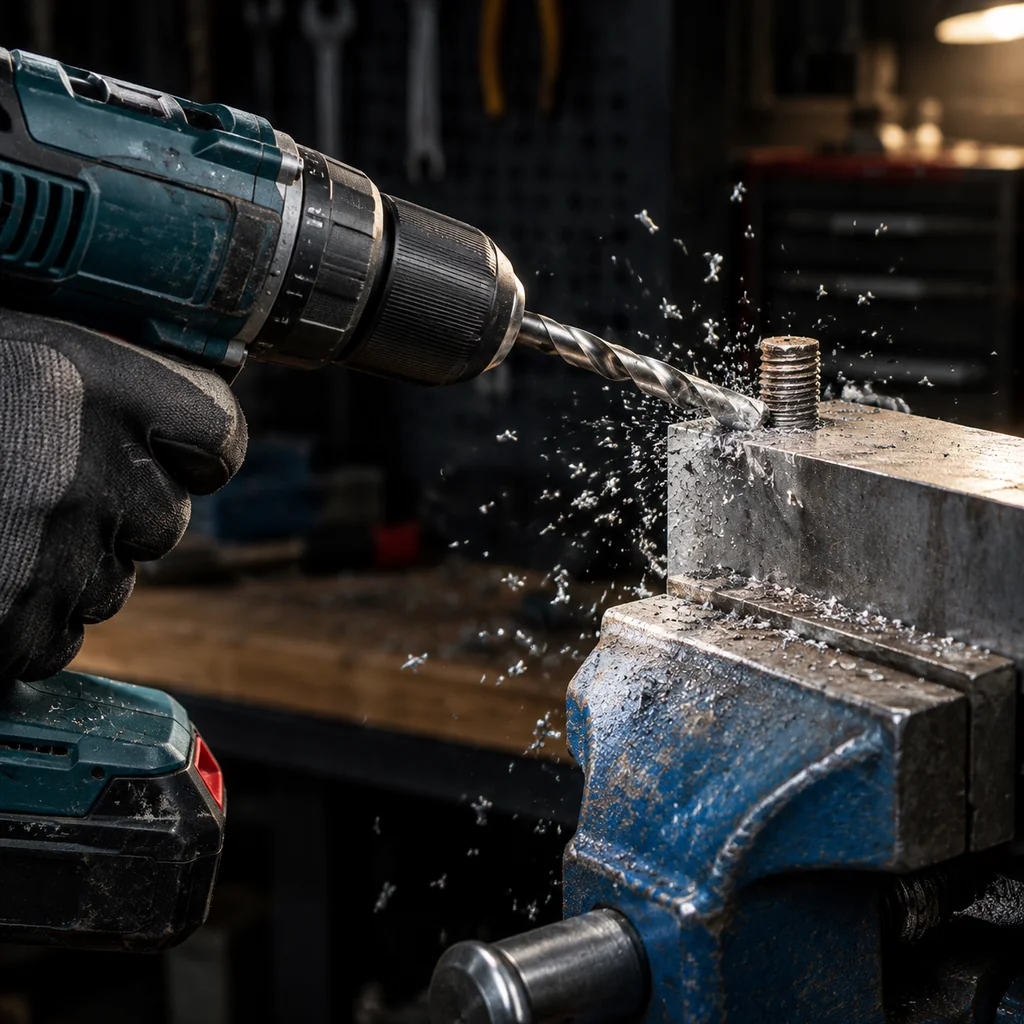
- It drills the pilot hole the extractor needs.
- Its rotation loosens: the counterclockwise cut pushes against a broken bolt in the unwinding direction, and many broken bolts back themselves out during this step, before the extractor is ever picked up.
The sequence most shops run is therefore: center punch, left-hand drill into the broken stud, and only if the piece does not back out on its own, switch to the extractor. A bolt extractor drill bit set pairs the two tools in matched sizes for exactly this reason. Running a normal right-hand bit first is not wrong, but it gives up the chance of the free win, and it tends to pack chips into the broken piece's own threads.
Choosing the Pilot Drill Size
Extractor sizes and recommended pilot drill diameters vary by manufacturer and product series, so there is no universal pairing table worth printing. Always refer to the sizing chart supplied with the specific extractor set. Using the wrong pilot hole diameter can prevent proper engagement or increase the risk of damaging the extractor and the surrounding threads.
Two principles hold across every manufacturer's chart. First, the pilot hole should end up slightly smaller than the extractor's gripping diameter at its bite depth, so the flutes have metal to grab. Second, drill the pilot hole only about as deep as the broken piece itself; a hole deeper than the part does not improve grip.
If the extractor spins without gripping the broken fastener, stop applying torque and check the pilot hole diameter, depth, alignment, and extractor compatibility. Do not automatically switch to a larger extractor, as enlarging the hole may damage the remaining fastener material or the surrounding threads.
How to Use a Screw Extractor: The Workflow
With the scene judged and the size matched, the removal workflow runs in seven steps:
- Center-punch the broken stud. The pilot hole must start true; a wandering start damages the surrounding threads.
- Drill the pilot hole with the left-hand bit at low speed, cutting fluid on harder stock, to the depth of the broken piece.
- Give the left-hand drill its chance. Slow the feed near full depth; if the broken piece starts turning counterclockwise, keep going and let it back out. Many jobs end here.
- Seat the extractor. Tap it lightly into the pilot hole until the flutes bite, then set the tap handle counterclockwise.
- Load torque gradually. Slow, steady counterclockwise pressure with light tapping shocks; if it refuses to move, step back down to penetrating oil and patience rather than more force.
- Watch for extractor stress. The moment the extractor feels like it is winding up (a springy, deferred return on the handle), stop; that is the preload that snaps extractors. Back it out, re-seat deeper, or go one size up.
- Clean and inspect the hole. Once the piece is out, chase the threads with the appropriate tool and clear chips before reassembly.
The two habits behind most broken extractors are skipping the center punch (which skews the pilot hole) and treating step 5 as a strength contest. The tool works by wedging, not by force.
Removing a Broken Tap: The Hardest Case
A tap that snaps inside a tapped hole is a harder problem than a broken bolt for one reason: tap steel is harder than bolt steel, and the extractor's grip depends on biting into the piece. The options, in ascending order of difficulty:
- Tap extractor tools: four-arm or two-arm prongs designed to slide down the tap's flutes and unscrew it. They work under limited conditions: the tap must not be jammed tight, the flutes must be accessible, and alignment has to be good. When they work, they save the part; when the tap is bound, they usually bend instead.
- Breaking the tap out in pieces: a punch and careful hammer work can fragment a brittle tap, at a real risk to the threads in the hole.
- Electrical discharge machining (EDM): a specialized method for removing broken taps, particularly when they are too hard or tightly jammed for conventional extraction. It removes conductive material through controlled electrical discharges and can help preserve the surrounding threads when properly performed. It is a shop service rather than a bench tool, and the part usually goes out to a shop that offers it.
Prevention is the better economics, which is why our guide to tap types spends time on the causes of tap breakage: undersized pilot holes, packed chips, and taps pushed after stalling.
When Extraction Fails: The Fallback Plan
Sometimes the extractor spins, the broken piece will not budge, and the honest answer is that it is not coming out intact. The fallbacks, in order of preference:
- Drill the whole piece out and re-tap one size larger. The hole becomes a new, larger thread; the mating fastener changes with it. This is often the fastest real-world resolution, and the tap drill chart gives the new pairing.
- Rebuild with a threaded insert. Drilling out and installing a coil or solid insert restores the original thread size; our threaded inserts for metal guide covers the process.
- Write the part off. For a housing with critical alignment or a one-off casting, the labor of the above may exceed replacement; that judgment belongs to whoever owns the part.
Extraction tools extend the range of what is recoverable, but they do not make every hole recoverable, and knowing where the line sits is part of using them well.
FAQ about Screw Extractor Guide
Q: How does a screw extractor work?
A screw extractor grips a broken fastener through specially designed flutes or teeth — spiral flutes, straight flutes, or multi-spline teeth, depending on the type. Many common extractors are turned counterclockwise after a pilot hole is drilled, allowing the gripping edges to engage the broken fastener and loosen it from the hole. Always follow the manufacturer's instructions for the specific extractor.
Q: How do you remove a broken bolt with no head?
Drill a centered pilot hole into the broken stud with a left-hand drill bit, then turn an extractor counterclockwise into the hole. The left-hand bit alone backs many broken bolts out; the extractor handles the rest.
Q: Which way do you turn a screw extractor?
Usually counterclockwise — most common extractors use a left-hand thread that tightens its grip as you turn it the "wrong" way, and that same motion unwinds the broken fastener from its hole. A few designs differ, so check the instructions supplied with your extractor.
Q: What size drill bit do I use before an extractor?
Use the sizing chart supplied with your specific extractor set — pairings vary by manufacturer and product series, so no general table is reliable. When in doubt, drill slightly small; and if the extractor spins without gripping, check the setup rather than forcing it.
Q: Why did my extractor break?
Extractors are hard and therefore brittle. The common causes are a pilot hole drilled off-center, too much torque applied as a strength contest, and continuing to turn after the piece has visibly stalled. A broken extractor inside the hole is a worse problem than the original broken bolt, so the torque discipline matters.
Q: Can you extract a broken tap?
Sometimes. Tap extractor prongs slide down the tap's flutes and can unscrew a tap that is not jammed tight, but taps are harder than bolts and often bind. A severely jammed broken tap usually goes to an EDM service, which removes it through controlled electrical discharges and can preserve the surrounding threads when properly performed.
About This Screw Extractor Guide
A screw extractor turns an unfixable-looking hole into a procedure: judge the failure (stripped head, broken bolt, or broken tap), drill a matched pilot hole with a left-hand bit, and let the counterclockwise wedge do the gripping, with the torque discipline that keeps the extractor itself intact. The tools in the set are simple; the difference between recovery and scrap is mostly in the order of operations.
When the piece comes out, the hole still has to hold hardware: chase the threads, clear the chips, and fit matched screws for the reassembly. And when extraction goes the other way, the hole gets rebuilt rather than abandoned: one size up by re-tapping, or restored to its original thread with the inserts in our threaded inserts guide.
Keep Learning
Screw Extractor Guide: How to Remove Broken Bolts and Studs
Key Takeaways A screw extractor (commonly called an easy out) is a hardened tool for removing broken fasteners, gripping them through spiral flutes, straight flutes, or multi-spline teeth depending on its design; many common types engage when turned counterclockwise. The workflow is drill a pilot hole, then turn the extractor counterclockwise; a left-hand drill bit often does the whole job on its own, backing the broken piece out while drilling. Broken-bolt and stripped-screw are different problems: a......
How to Measure Thread Size: Pitch, TPI & Bolt Threads
Key Takeaways How to measure thread size comes down to two numbers: the major diameter (measured across the thread crests) and the pitch, which is threads per inch (TPI) on inch threads and millimeters between crests on metric threads. A thread pitch gauge is the purpose-built tool: fan out the blades, find the one whose teeth mesh with no visible gaps, and read the size stamped on it. Measure the major diameter with a caliper across a full thread, away from the chamfered end; the reading narrows the ......
Advantages and Disadvantages of Articulated Robots
Introduction Articulated robots offer high flexibility, multi-axis movement, and the ability to handle complex manufacturing tasks, making them suitable for a wide range of automated applications. However, their advantages come with trade-offs, including higher initial investment, programming complexity, maintenance requirements, and safety considerations. Understanding these advantages and disadvantages helps manufacturers determine when articulated robots provide practical value and when other autom......
Types of Taps: A Complete Guide to Tap and Die Types
Key Takeaways Types of taps differ mainly in three ways: where the chips go (spiral point vs spiral flute), how the thread is formed (cut vs form), and how much lead taper the front carries (taper, plug, bottoming). Hand taps come as a three-piece set — taper, plug, and bottoming — distinguished by the length of the chamfered lead, and the right one depends mainly on whether the hole goes through. Spiral point taps push chips forward ahead of the cut and suit through holes; spiral flute taps pull chip......
Metric Screw Size Chart: M1–M24, Pitch & Tap Drill
Key Takeaways The M in an M8 bolt is the major diameter in millimeters: M8×1.25 reads as an 8mm outer diameter with a 1.25mm thread pitch, and coarse pitch is assumed when the pitch is not written. The metric screw size chart below covers the ISO coarse series M1–M24 with pitch, inch equivalents, and the common tap drill for each size. M8 and 5/16 inch sit only 0.06mm apart on diameter, but their thread pitches come from different systems; the two look-alikes must not be mixed in one assembly. Fine pi......
Drill Bit Size Chart: Number, Letter, Fractional & Metric
Key Takeaways A drill bit size chart has to cover four systems — fractional (inches), number (#1–#80), letter (A–Z), and metric (mm) — because the same physical diameter can carry three different callouts. Number sizes provide intermediate diameters between standard fractional-inch drill sizes, allowing finer selection where 1/64-inch increments are too coarse — which is why a 1/4-20 tap takes a #7 drill (0.201 inch). Convert decimal inches to millimeters by multiplying by 25.4; the charts below give ......