Types of Taps: A Complete Guide to Tap and Die Types
16 min
- What Is a Tap and Die Set?
- Hand Taps: Taper, Plug, and Bottoming
- Spiral Point vs. Spiral Flute Taps
- Cut Taps vs. Form (Roll) Taps
- Thread Mills: The Milling Alternative
- Pipe Taps: What Makes Them Different
- Tap Handles, Wrenches, and Die Stocks
- What a Good Tap Set Includes
- How to Use a Tap and Die Set: The Workflow
- Matching the Tap to the Material
- FAQ about Types of Taps Explained
- About This Types of Taps Guide
Key Takeaways
- Types of taps differ mainly in three ways: where the chips go (spiral point vs spiral flute), how the thread is formed (cut vs form), and how much lead taper the front carries (taper, plug, bottoming).
- Hand taps come as a three-piece set — taper, plug, and bottoming — distinguished by the length of the chamfered lead, and the right one depends mainly on whether the hole goes through.
- Spiral point taps push chips forward ahead of the cut and suit through holes; spiral flute taps pull chips back out of the hole and suit blind holes.
- Form (roll) taps displace metal instead of cutting it, so they need a larger pre-hole than cutting taps of the same size; take that hole from the tap maker's data.
- Thread mills cut the same threads on a CNC machining center with lower breakage risk; hand tapping still wins on simple setups and repair work.
- A basic tap and die set pairs the taps with dies for external threads, and the tap handle you put behind them matters as much as the tap itself.
An M6 hole is an M6 hole until a tap goes into it. The same drilled hole, tapped with three different taps, can produce a clean, fully formed thread, a thread that is torn at the bottom, or a broken tap stuck so deep in the part that the workpiece itself becomes scrap. The tap is a small, inexpensive-looking tool, and it is also one of the few hand tools that can ruin a finished part in a single motion, which is why machinists care so much about the types of taps and where each one belongs.
This guide sorts the whole family: the hand tap set (taper, plug, bottoming), the chip-management variants (spiral point, spiral flute), the forming alternative (roll taps), the CNC-era thread mill, pipe taps, and the handles and die stocks that drive them, ending with a working workflow for using a tap and die set from drilled hole to finished thread.
What Is a Tap and Die Set?
A tap cuts internal threads: the female thread inside a hole. A die cuts external threads (the male thread on a rod or stud). A tap and die set pairs the two, usually with the wrenches that drive them: a tap handle (T-handle or adjustable bar) for the taps, and a die stock that grips the round dies.
The pair matters because a threaded joint needs both halves cut to the same standard — an M6×1.0 tap and an M6×1.0 die produce the mating pair. For the size system behind those callouts, our metric screw size chart lists the full ISO series with pitches, and the inch equivalents sit in our tap drill chart alongside the drill pairings.
Pick a Tap by Three Questions
Most tap decisions resolve from three answers:/n/n| Your situation | Start with | |---|---| | Through hole, general steel | Spiral point (gun) tap | | Blind hole, ductile material | Spiral flute tap | | Blind hole, threads needed near the bottom | Bottoming tap (after a taper or plug) | | Ductile material, and chips are the problem | Form (roll) tap | | Tapered pipe thread | Pipe tap (NPT-style) |
The sections below unpack each of those rows.
Hand Taps: Taper, Plug, and Bottoming
Of the three sorting questions, this section answers the lead question. The classic hand tap set contains three taps of the same size, and the difference between them is easy to see once you know what to look for: the length of the chamfered lead at the front, where the cutting teeth taper down to nothing. Hand taps commonly run from #0 (0.060 inch) up to 1/2 inch in the inch series, and across the M1–M24 metric range covered by the size chart on this site.
| Tap type | Chamfered lead (commonly described as) | Where it belongs |
|---|---|---|
| Taper tap | Long lead, roughly 7–10 threads | Starting threads straight, hard materials, through holes |
| Plug tap | Medium lead, roughly 3–5 threads | General purpose; the default in most sets |
| Bottoming tap | Short lead, 1–2 threads | Finishing threads close to the bottom of a blind hole |
These ranges are typical, not standard values — actual chamfer lengths vary by tap design and standard (Guhring's catalog, for example, lists medium leads at roughly 3.5–5.5 threads and extra-short leads at 1.5–2: Guhring tap data).
The lead exists to spread the cutting load across several threads. A long taper starts square and cuts gently, which is why it opens the thread in a new hole; each following tap (plug, then bottoming) reaches deeper because it has less lead and more full teeth. In a through hole, a plug tap alone often completes the job. For manual tapping in a blind hole, a taper or plug tap can start the thread, followed by a bottoming tap when threads are needed closer to the hole bottom. The required sequence depends on the tap design and the thread depth: allow sufficient clearance for the tap chamfer and any chips, and determine the required tapping depth accordingly — which is why tap sets keep all three in the same size.
Spiral Point vs. Spiral Flute Taps
Beyond the lead, chip management separates the next group of tap types. Cutting a thread produces chips, and where those chips go decides whether the tap cuts cleanly or packs up and breaks.
| Feature | Spiral point (gun) tap | Spiral flute tap |
|---|---|---|
| Chip direction | Forward, pushed ahead of the tap | Backward, pulled up and out of the hole |
| Best hole type | Through holes | Blind holes |
| Cutting feel | Lower torque, faster tapping | Cleaner threads at the hole bottom |
| Watch-out | Chips exit the far side — plan for them | Chip evacuation limits practical depth |
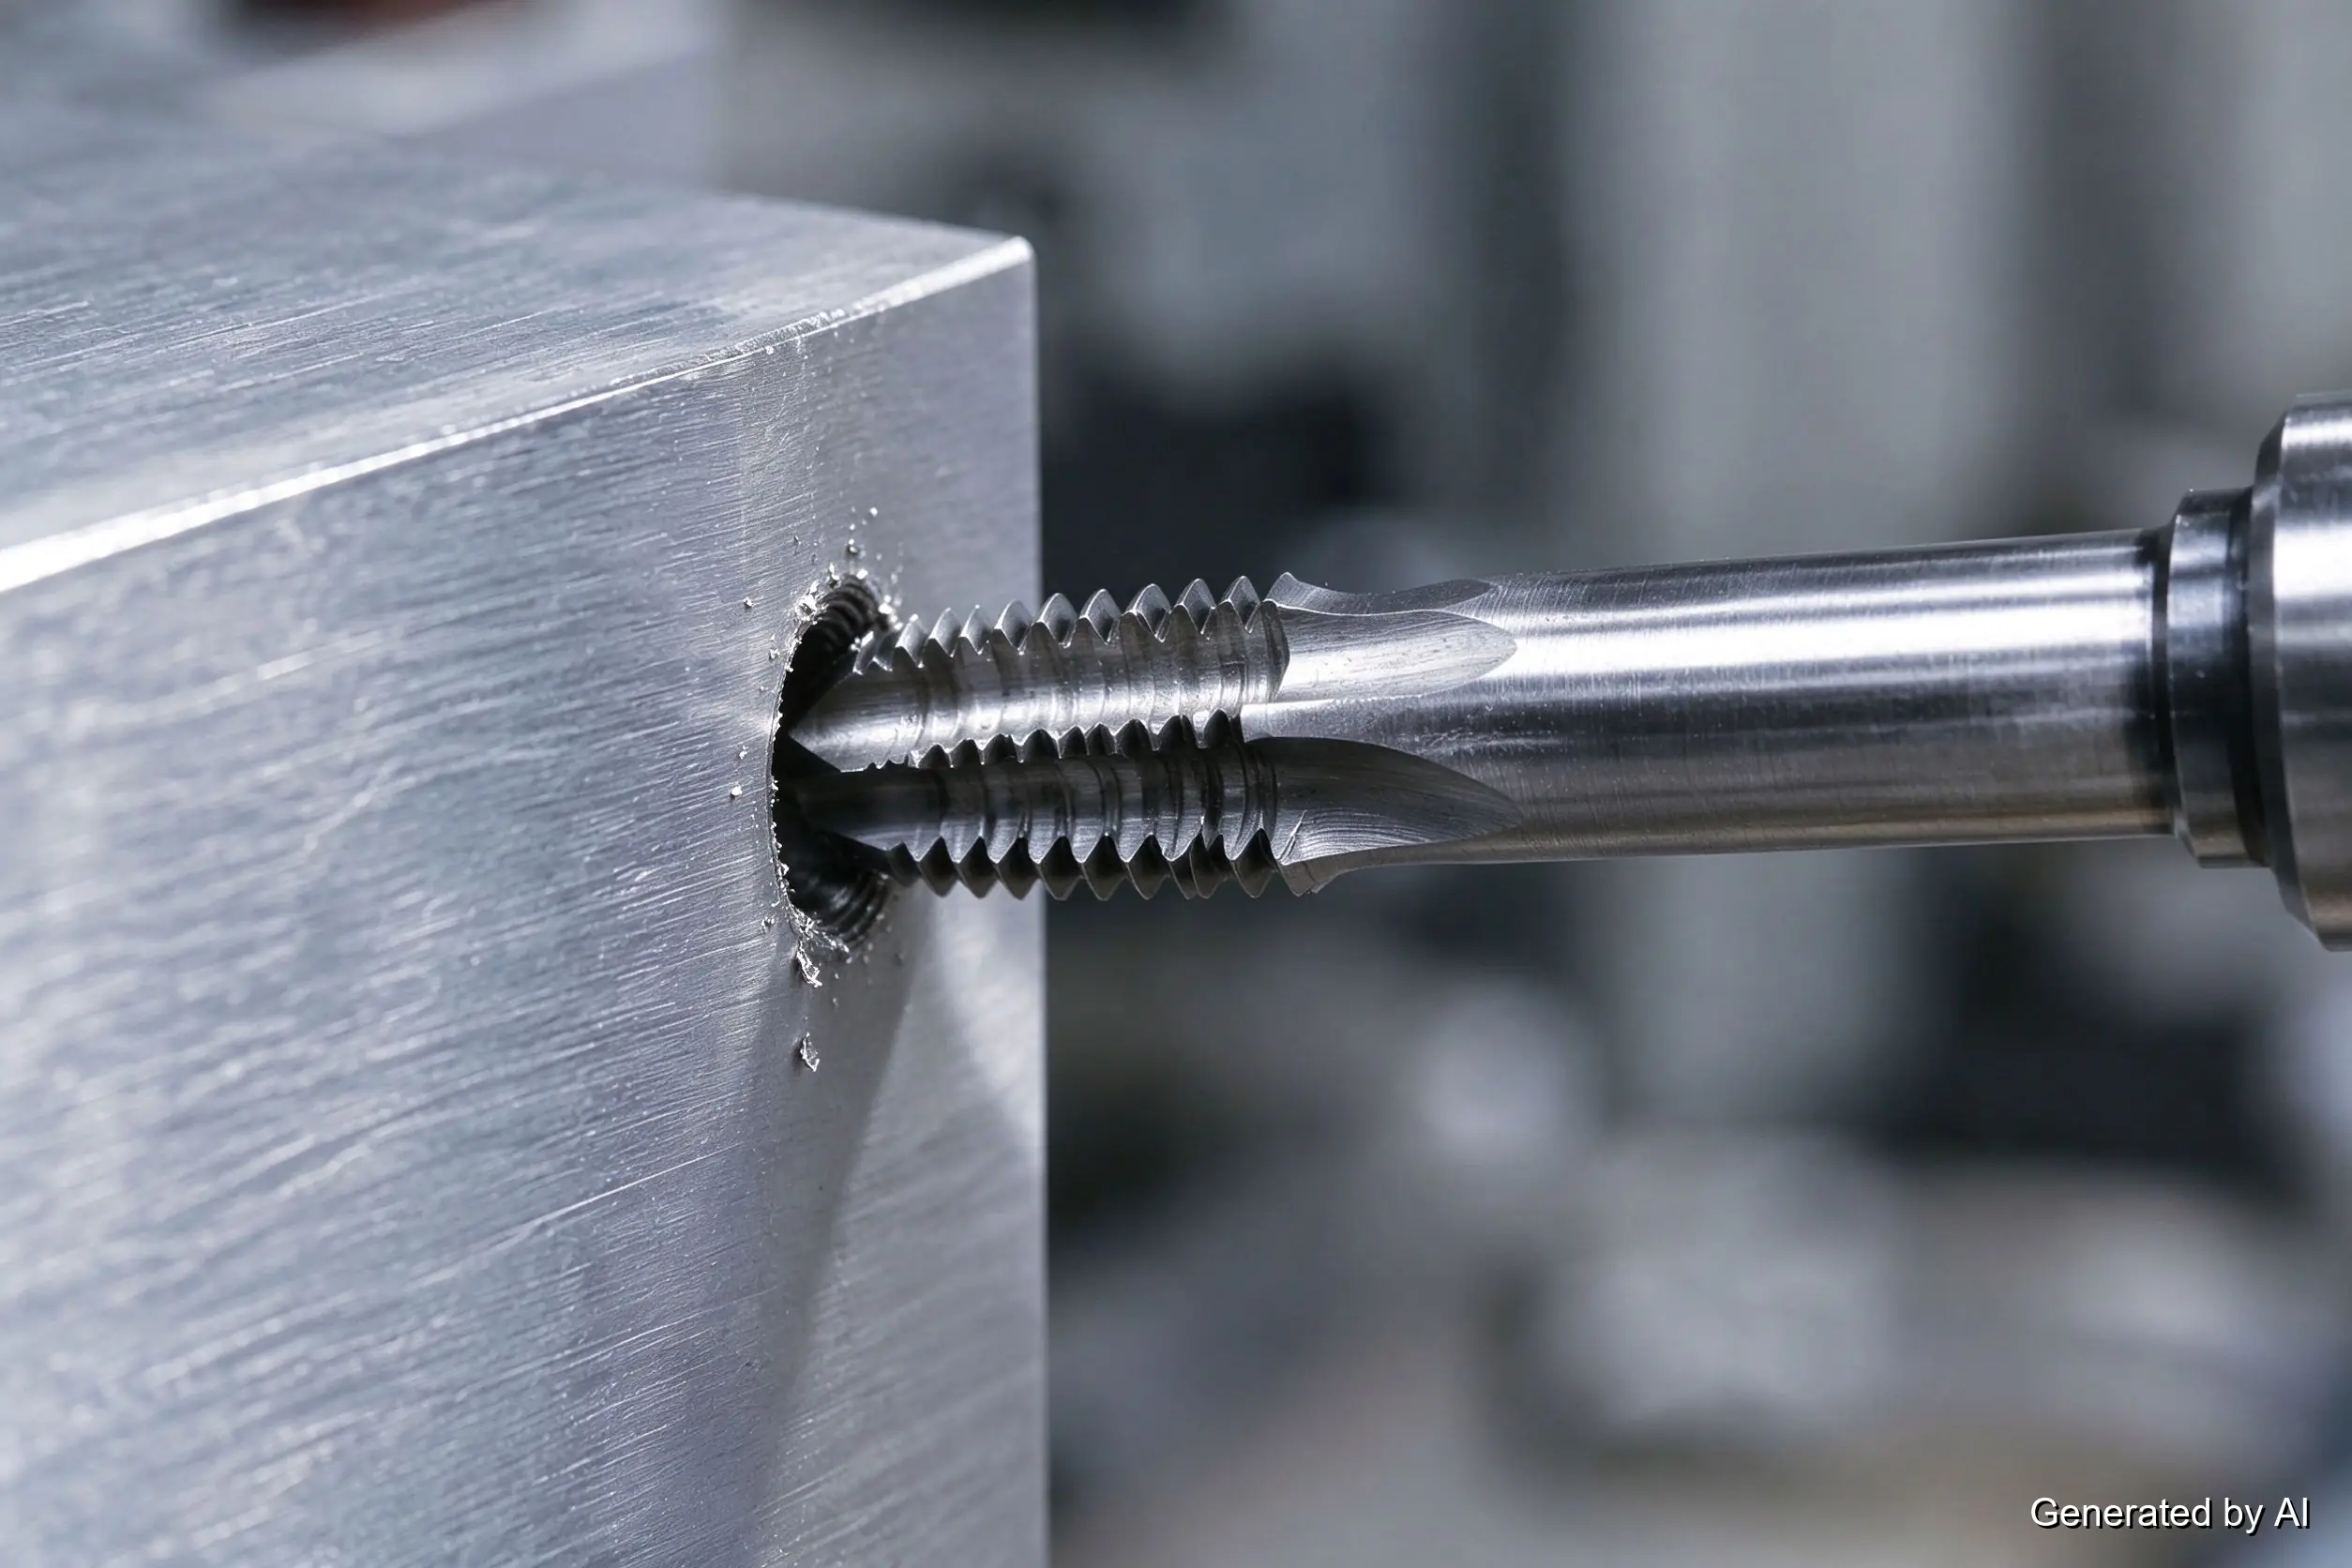
A spiral point tap has a straight flute with an angled cutting face that rolls the chip forward, ahead of the cutting edge, into the part of the hole that is about to be cut away. That is why it shines in through holes with room for the chips to exit or collect ahead of the cut. In a blind hole those chips have nowhere to go, and they pack the flutes — a spiral point is not the default choice there just because it is a spiral point.
A spiral flute tap does the opposite: its helical flutes lift chips back up and out of the hole the way a drill bit clears its own chips. That makes it the natural blind-hole tap, at the cost of slightly higher torque and a shallower practical depth. Some spiral flute taps are also designed to cut through softer, stringy material more cleanly than a straight-flute hand tap, and choosing between the two starts with one question: does the hole exit the part?
Cut Taps vs. Form (Roll) Taps
Almost every tap above is a cutting tap: it removes metal. The alternative displaces it. A form tap (also called a roll tap) has no cutting edges in the traditional sense — its lobed profile presses the material outward, plastically forming the thread profile.
- Form tap strengths: no chips to evacuate (a real advantage in small blind holes) and a work-hardened, often smoother thread surface; in ductile materials such as aluminum and mild steel the formed thread can be stronger — the final performance depends on the material, hole size, thread engagement, and process.
- Form tap requirements: the material must be ductile enough to flow; hard, brittle, or abrasive stock does not form cleanly; tapping torque runs higher; and the pre-tap hole must be larger than the cutting-tap hole for the same thread, with the exact size coming from the tap manufacturer's chart rather than a cutting-tap table.
That last point is where many form-tap jobs go wrong: a hole drilled to the cutting-tap figure starves the forming process, and the tap seizes. For an M6×1.0 thread, the pre-tap hole for a forming tap is generally larger than that for a cutting tap; the required diameter depends on the target thread percentage, workpiece material, and tap design. Always use the forming-tap manufacturer's recommended hole-size chart rather than a cutting-tap drill chart. The rule is simply to source the hole from the form-tap data sheet for the specific tap and material.
Thread Mills: The Milling Alternative
A thread mill is not a tap at all — it is a small milling cutter that helically interpolates a thread inside a hole on a CNC machining center, traveling a circular path while moving down (or up) one pitch per revolution.
The trade-offs against tapping look different from a machine shop's point of view:
- One cutter, many sizes — a single thread mill can cut a range of diameters at the same pitch, where every tap size needs its own tap.
- No tap breakage in the part — a broken tap in a nearly finished workpiece is among the most expensive small failures in machining; a broken thread mill is simply replaced and the hole re-cut.
- Better control in hard material and deep threads, with flexible control of thread diameter by adjusting the toolpath. Note that an oversized pre-drilled hole cannot be fixed by re-interpolation: it reduces thread engagement, and the finished thread may miss its required dimensions or strength.
- The cost side: it needs a CNC machine and rigid setup, cycles slower than tapping in production, and it makes no sense on a bench with no mill, which is why hand tapping remains the default for maintenance, repair, and low-volume assembly work.
For a deeper look at how thread mills fit into a machine shop's tooling strategy, tooling suppliers publish dedicated selection guides; the practical boundary for most assembly work is simple — no CNC, no thread mill.
Pipe Taps: What Makes Them Different
Pipe threads come in tapered and straight forms, and their sealing requirements depend on the thread standard and joint design. Tapered NPT-style threads typically rely on thread interference and commonly use a suitable thread sealant; straight pipe threads do not necessarily provide a pressure-tight seal on their own. Pipe taps are sized by nominal pipe size rather than thread diameter, and their drill sizes deliberately ignore the straight-thread formula — the geometry behind that, and the full NPT size chart, is covered in our NPT thread guide.
Tap Handles, Wrenches, and Die Stocks
The tap handle is the force behind the whole operation, and it comes in two common forms:
- Adjustable (bar-type) tap handles grip square-shank taps of a size range; their length adds turning force for larger taps and helps keep the tap rotating square to the hole.
- T-handle taps wrenches give better feel for small taps, where too much turning force converts directly into too much torque, and with it a snapped tap. Ratcheting versions speed up the back-and-forth motion in tight spaces.
Die stocks are the die-side equivalent: a round frame that grips the die and two handles for turning. The handle advice that matters most: match the handle to the tap size, keep the rotation square, and back off the moment turning resistance rises.
What a Good Tap Set Includes
Tap sets vary widely, and the useful differences come down to three decisions:
- System coverage — UNC/UNF only, metric only, or a mixed set. Match the set to the hardware you actually service; a mixed Inch+metric master set covers most repair benches, while a metric-only set suits European-standard machine work.
- Three-piece versus single taps — better sets include taper, plug, and bottoming in each size; budget sets often ship plug taps only, which limits blind-hole work.
- Material grade — standard HSS covers most bench work; cobalt-alloy taps (typically M35 or M42 grades) hold up noticeably better in stainless and abrasive stock. Coatings and specialty geometries (spiral point/flute in the same set) are the next tier up in price.
A quality die side matters less often than the taps, since most repair work needs external threads far less than internal ones — but a set that includes dies, a die stock, and a pitch gauge is the version that genuinely replaces a trip to the hardware store.
How to Use a Tap and Die Set: The Workflow
The difference between a clean thread and a broken tap is usually procedure, not strength:
- Drill the correct pre-tap hole — from the tap drill chart for cutting taps, or the tap manufacturer's tap-drill chart for roll taps; the hole is the single biggest variable in the whole operation.
- Chamfer the hole entrance — a small countersink helps the tap start square and keeps the first thread from bulging.
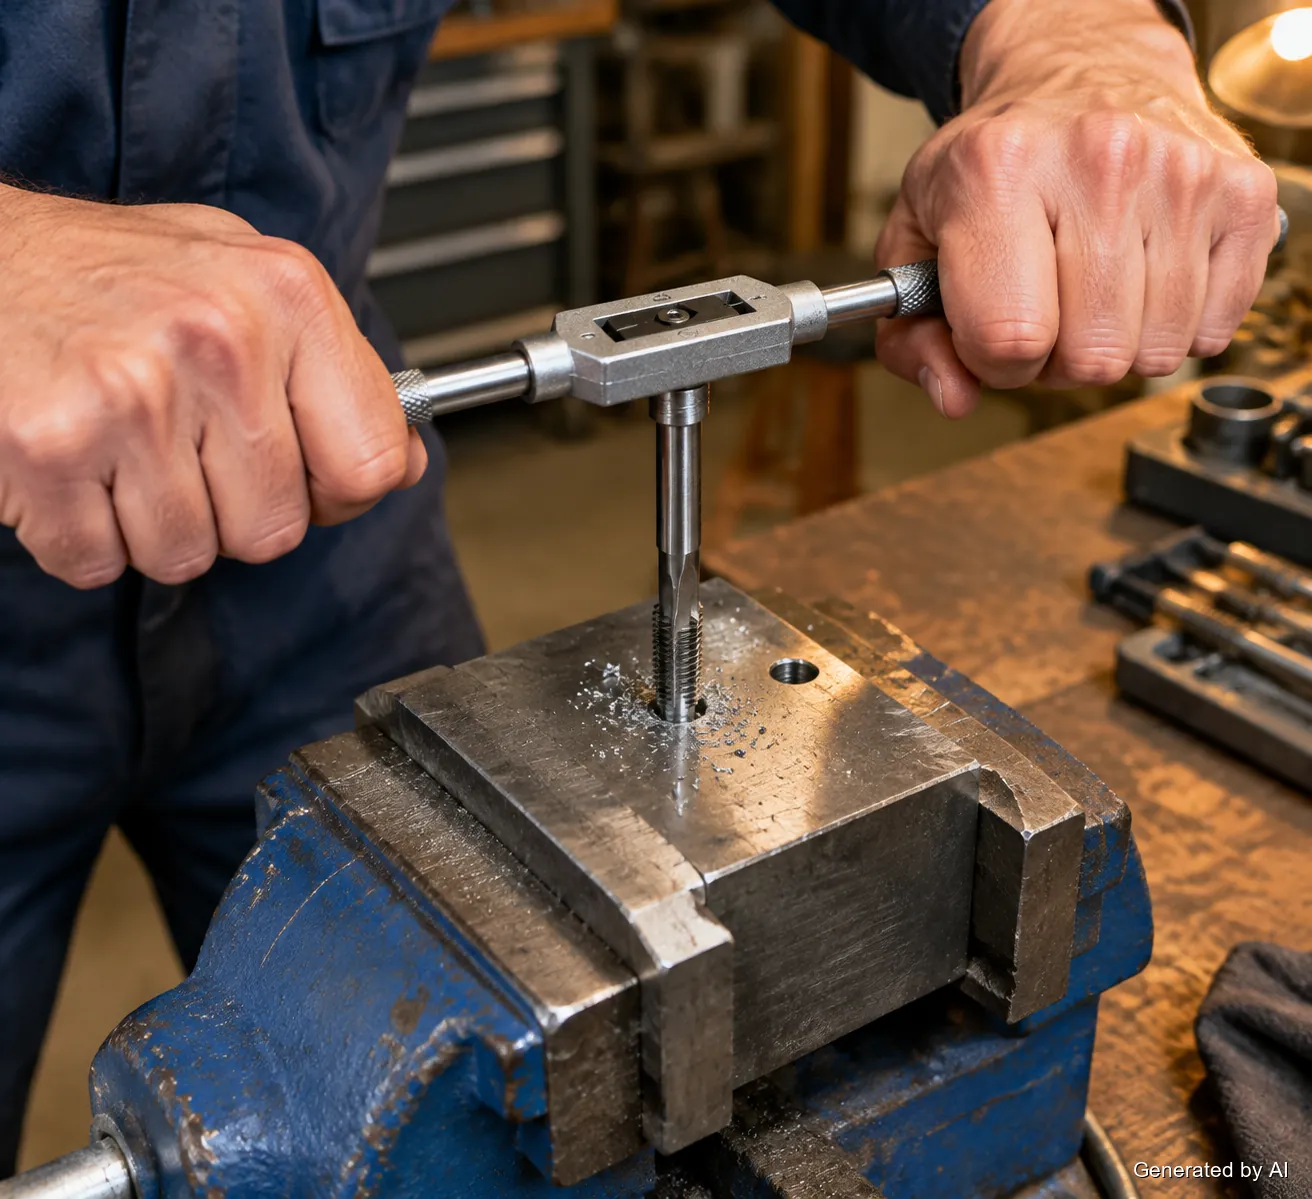
- Mount the tap in the handle and start square — two full turns with light pressure, checking alignment from two directions; a misaligned start is the most common cause of a crooked thread.
- Cut with oil — cutting fluid reduces torque and improves finish in steel; even a light oil beats dry tapping for thread quality and tap life.
- Turn, back, clear — advance about a half-turn, back off a quarter-turn to break the chip, and repeat; chips that pack into the flutes are the direct cause of most broken taps.
- Keep it straight through the cut — the tap should follow the hole, not be steered; let the lead do the guiding.
- Check the thread — test with the mating fastener before the part moves on; the thread should run up with firm, even resistance.
- For dies, mirror the process — square the die on the rod end, start with the chamfer side, cut with the same turn-and-back rhythm, and check with a nut.
The rhythm in steps 5 and 6 is where beginners lose taps: steady pressure, small advances, and frequent backing-off feel slow and finish first.
Matching the Tap to the Material
| Workpiece | Usually preferred | Why (verify for the specific job) |
|---|---|---|
| Aluminum, soft alloys | Spiral flute or form taps | Chips are stringy; forming works well in ductile stock |
| Mild steel | Spiral point (through) / spiral flute (blind) | Standard geometry covers most jobs |
| Stainless steel | Cobalt-grade spiral point/flute, generous oil | Work-hardening stock punishes dull taps and dry cutting |
| Cast iron | Straight-flute (hand) taps | Short, crumbly chips — evacuation is less critical |
| Thin sheet | Form taps or spiral point | Possible when material ductility and the required thread engagement support it |
These pairings are starting points, not rules: material condition, hole depth, and tap quality all shift the answer, and for repeated production work the tap supplier's application data takes priority over any general table.
FAQ about Types of Taps Explained
Q: What are the three basic types of taps?
The classic hand tap set: taper taps with a long chamfered lead for starting, plug taps as the general-purpose middle ground, and bottoming taps with almost no lead for finishing threads near the bottom of a blind hole. Most tap types beyond these three differ in chip management (spiral point vs spiral flute) or thread formation (cut vs form).
Q: What is a spiral point tap used for?
A spiral point (gun) tap pushes chips forward, ahead of the cutting edge, which makes it the preferred tap for through holes — the chips exit through the far side instead of packing the flutes. It taps with lower torque and holds up well at higher speeds.
Q: What is the difference between a cut tap and a form tap?
A cut tap removes metal to create the thread; a form tap displaces material plastically to form it. Form taps leave no chips and can produce stronger threads in ductile materials, but they need a larger pre-tap hole, higher torque, and a workpiece that can flow; hard or brittle stock does not form cleanly.
Q: Can I use a plug tap to start a thread?
Yes — the plug tap's medium lead is designed to start threads acceptably, and in through holes it often completes the whole job alone. In blind holes, a taper tap starts more square and gently, which is why the three-piece set exists; for shallow work where starting is easy, many machinists go straight to a plug tap.
Q: What size tap handle do I need?
Match the handle to the tap: small taps (roughly M5 and under, or #10 and under) benefit from a T-handle for feel and control, while larger taps need a longer bar-type handle for turning force. An oversized handle on a small tap is a common way to break taps: force you do not need still arrives at the tap.
Q: How do I keep taps from breaking?
Four habits cover most of it: drill the correct pre-tap hole, use cutting oil, back off regularly to break chips, and stop the moment torque rises sharply. A broken tap usually traces back to a hole drilled too small, packed chips, or a tap pushed after it has already stalled; if a tap stops advancing, back it out and clear it rather than forcing on.
About This Types of Taps Guide
Every type of tap answers one of three questions: where the chips go, how the thread is formed, and how much lead the cut needs. Sort a job by those three (through hole or blind, ductile or hard, deep thread or shallow) and the tap picks itself: spiral point for through holes, spiral flute for blind ones, form taps where chips are the enemy, bottoming taps where the hole floor is close.
The hardware that goes into those threads — matched screws for the assembled joint, and inserts where a tapped hole needs a second life — is the fastening side of the same workflow, covered in our threaded inserts guide. Need a tap for a specific material or hole type? Browse JLCMC's tap selection by thread size, material, and application to pair the tool with the thread you just sized.
Keep Learning
How to Measure Thread Size: Pitch, TPI & Bolt Threads
Key Takeaways How to measure thread size comes down to two numbers: the major diameter (measured across the thread crests) and the pitch, which is threads per inch (TPI) on inch threads and millimeters between crests on metric threads. A thread pitch gauge is the purpose-built tool: fan out the blades, find the one whose teeth mesh with no visible gaps, and read the size stamped on it. Measure the major diameter with a caliper across a full thread, away from the chamfered end; the reading narrows the ......
Advantages and Disadvantages of Articulated Robots
Introduction Articulated robots offer high flexibility, multi-axis movement, and the ability to handle complex manufacturing tasks, making them suitable for a wide range of automated applications. However, their advantages come with trade-offs, including higher initial investment, programming complexity, maintenance requirements, and safety considerations. Understanding these advantages and disadvantages helps manufacturers determine when articulated robots provide practical value and when other autom......
Types of Taps: A Complete Guide to Tap and Die Types
Key Takeaways Types of taps differ mainly in three ways: where the chips go (spiral point vs spiral flute), how the thread is formed (cut vs form), and how much lead taper the front carries (taper, plug, bottoming). Hand taps come as a three-piece set — taper, plug, and bottoming — distinguished by the length of the chamfered lead, and the right one depends mainly on whether the hole goes through. Spiral point taps push chips forward ahead of the cut and suit through holes; spiral flute taps pull chip......
Metric Screw Size Chart: M1–M24, Pitch & Tap Drill
Key Takeaways The M in an M8 bolt is the major diameter in millimeters: M8×1.25 reads as an 8mm outer diameter with a 1.25mm thread pitch, and coarse pitch is assumed when the pitch is not written. The metric screw size chart below covers the ISO coarse series M1–M24 with pitch, inch equivalents, and the common tap drill for each size. M8 and 5/16 inch sit only 0.06mm apart on diameter, but their thread pitches come from different systems; the two look-alikes must not be mixed in one assembly. Fine pi......
Drill Bit Size Chart: Number, Letter, Fractional & Metric
Key Takeaways A drill bit size chart has to cover four systems — fractional (inches), number (#1–#80), letter (A–Z), and metric (mm) — because the same physical diameter can carry three different callouts. Number sizes provide intermediate diameters between standard fractional-inch drill sizes, allowing finer selection where 1/64-inch increments are too coarse — which is why a 1/4-20 tap takes a #7 drill (0.201 inch). Convert decimal inches to millimeters by multiplying by 25.4; the charts below give ......
2-Bolt vs. 4-Bolt Flange Bearing Units: Selection Differences That Matter
Key Takeaways Housing geometry and space: A two-bolt flange bearing unit normally uses an oval or diamond-shaped housing, making it ideal when the mounting face is narrow or access is limited. Bolt count vs. capacity: A four-bolt flange bearing unit normally uses a square housing suited for wider interfaces, but bolt count alone does not establish the unit's load capacity. Machine interface priority: Choose the housing pattern based on the machine interface first. Then verify shaft size, published loa......